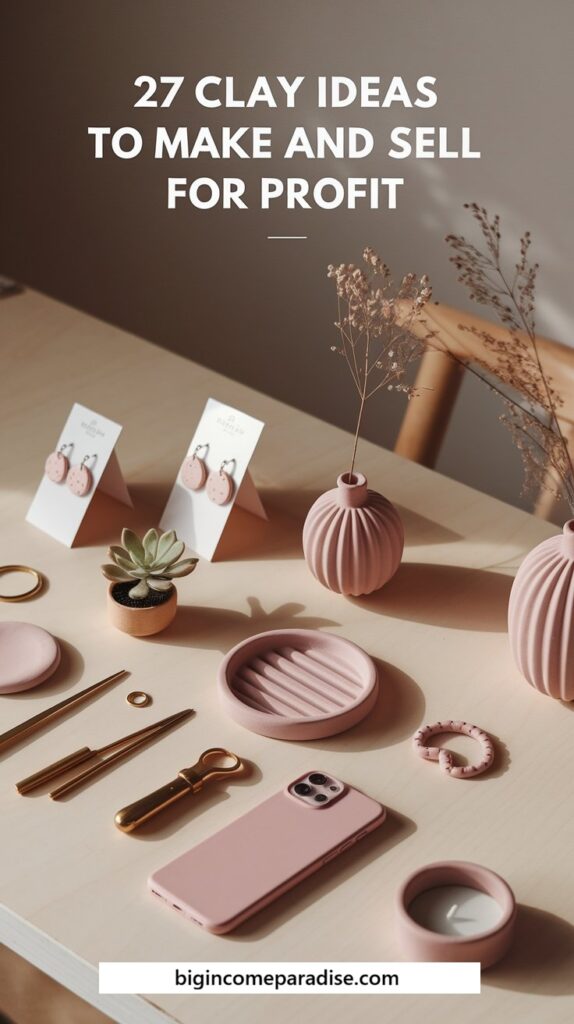
If you’re tired of making cute stuff that nobody buys, you’re in the right place. These clay ideas are picked for selling, not just for looks.
You’ll get 27 different products people actually buy, and you can sell them online or at craft fairs. Each idea includes why it sells, what you need, what to charge, what to avoid, and step-by-step instructions.
Start with the first idea that feels easiest to finish, and you’ll know exactly what to do next.
Clay earrings
Why it sells: People buy clay earrings because they feel fun, light, and giftable, and they’re an easy “yes” price.
Materials and tools: Air dry clay, acrylic roller or rolling pin, parchment paper, clay cutters or a craft knife, needle tool or toothpick, sanding sponge or fine sandpaper, jump rings, earring hooks or posts, strong craft glue, acrylic paint or paint pens, and a clear matte or glossy sealer.
Pricing: $12-$28 per pair, or $30-$55 for a 2-pair gift set.
Mistakes to avoid:
- Rolling the clay too thin, because it cracks fast
- Skipping sanding, because rough edges look cheap
- Adding hardware before it’s fully dry and sealed
- Forgetting sealer, so paint rubs off
How to sell more:
- Sell mini collections like “Neutrals” or “Pastels” to raise order value
- Offer clip-on options for non-pierced ears
- Name each style clearly, like “Terrazzo Drops” or “Cloud Studs”
- Add a tiny care card, so buyers trust you more
Where to sell: Etsy and other online marketplaces where photos do the selling, or craft fairs where people can touch and try them on.
How to create (step by step):
- Roll the clay on parchment paper until it’s smooth and even.
- Cut your shapes with cutters or a clean craft knife.
- Make holes for jump rings if you’re making dangles.
- Let pieces dry flat, then flip once so they dry evenly.
- Sand edges gently until they feel smooth to the touch.
- Paint or add details, then let everything dry fully.
- Seal both sides, then let the sealer cure completely.
- Add jump rings and hooks, then do a gentle tug test.
You’ll also love to read my other blog post with 17 Easy Crafts to Sell That Make a Profit Fast
Clay hair clips
Why it sells: Clay hair clips sell because they’re cute, useful, and easy to grab as a small gift. People also buy more than one, because they want different colors for different outfits.
Materials and tools: Air dry clay, acrylic roller or rolling pin, parchment paper, craft knife or small cutters, sanding sponge or fine sandpaper, strong craft glue, metal hair clip bases, acrylic paint or paint pens, and a clear matte or glossy sealer.
Pricing: $8-$18 per clip, or $22-$45 for a set of three.
Mistakes to avoid:
- Making the clay piece too thick, because it gets heavy on hair
- Skipping sanding, because rough edges catch hair
- Gluing onto a dusty surface, because it pops off later
- Sealing only one side, because it can warp
How to sell more:
- Sell sets by color like neutrals, pastels, or bold brights
- Offer two sizes, one for bangs and one for full hair
- Add simple names like “Wavy Clip” or “Daisy Clip” for fast buying
- Package in a small gift card backing, so it feels premium
Where to sell: Etsy and social shops work well when your photos are bright and clean, and craft fairs work well because people can touch and try them fast.
How to create (step by step):
- Roll the clay on parchment paper until it’s smooth and even.
- Cut your shape, then smooth the edges with a damp finger.
- Let the piece dry flat, and flip it once to dry evenly.
- Sand the edges until they feel soft and clean.
- Paint your design, and let it dry fully.
- Seal both sides, then let the sealer cure completely.
- Lightly sand the back where it will glue, so it grips better.
- Glue the clay piece onto the metal clip base, then press and hold it steady.
- Let the glue cure overnight, then do a gentle pull test before selling.
Clay necklace pendants and charms
Why it sells: Clay pendants sell because they feel personal, and people love jewelry that looks one of a kind. Charms also make it easy to buy more than one, because buyers can mix and match.
Materials and tools: Air dry clay, acrylic roller or rolling pin, parchment paper, small cutters or a craft knife, needle tool or toothpick, sanding sponge or fine sandpaper, jump rings, necklace chain or cord, clasp, strong craft glue, acrylic paint or paint pens, and a clear matte or glossy sealer.
Pricing: $12-$30 per pendant, or $28-$65 for a necklace with 2-3 charms.
Mistakes to avoid:
- Making the hole too close to the edge, because it can crack
- Skipping sanding, because the pendant looks rough up close
- Sealing too soon, because it can feel sticky or cloudy
- Using weak jump rings, because charms fall off
How to sell more:
- Offer charm add-ons, so buyers can build their own set
- Sell matching earring sets, because people love a full look
- Add initials, birth flowers, or tiny symbols, because it feels custom
- Name each style clearly, like “Moon Charm” or “Terrazzo Oval,” so buyers choose fast
Where to sell: Online works great when you show close-up photos and size notes, and craft fairs work well when people can try on the chain and feel the weight.
How to create (step by step):
- Roll the clay on parchment paper until it’s smooth and even.
- Cut your pendant shape, then smooth the edges with a damp finger.
- Use a needle tool to make a hole for the jump ring, and keep it away from the edge.
- Let the piece dry flat, then flip it once so it dries evenly.
- Sand the edges until they feel smooth in your hand.
- Paint or add details, then let everything dry fully.
- Seal both sides, and let the sealer cure completely.
- Add a jump ring through the hole, then attach it to a chain or cord.
- Give it a gentle tug test, and make sure the ring closes tight before selling.
Clay bracelet beads and bead sets
Why it sells: Clay beads sell because they feel fun and personal, and people love picking colors that match their vibe. Bead sets also sell well because buyers like making their own bracelet, and they often buy extras for friends.
Materials and tools: Air dry clay, a small rolling tool or your hands, toothpicks or skewers, parchment paper, sanding sponge or fine sandpaper, acrylic paint or paint pens, a clear matte or glossy sealer, stretchy jewelry cord, scissors, a ruler or tape measure, and small packaging bags or boxes.
Pricing: $10-$22 for a finished bracelet, or $12-$35 for a bead kit that includes enough beads for 1-2 bracelets.
Mistakes to avoid:
- Making bead holes too small, because the cord won’t fit
- Making beads uneven, because the bracelet looks messy
- Not letting beads dry all the way, because holes crack
- Skipping sealer, because color can rub off
How to sell more:
- Sell bead kits by theme, like neutrals, pastels, or bright summer colors
- Add letter beads or a name option, because it feels more custom
- Offer a matching set, like bracelet plus keychain charm
- Include simple “how to string” steps in your listing photos, so buyers feel confident
Where to sell: Online works well because bead kits are easy to ship, and craft fairs work well because people love choosing colors in person.
How to create (step by step):
- Roll small clay balls in sizes that match, and keep them as even as you can.
- Push a toothpick through each bead to make the hole, then smooth the hole edges gently.
- Let the beads dry on the toothpick or laid flat, and rotate them once so they dry evenly.
- When fully dry, sand any rough spots until the beads feel smooth.
- Paint or add patterns, then let them dry completely.
- Seal the beads, and let the sealer cure fully before you touch them a lot.
- Cut stretchy cord to size, and string the beads in a pleasing order.
- Tie a strong double knot, and add a tiny drop of glue if you want extra hold.
- Stretch the bracelet gently a few times, then check the knot before selling.
Clay keychains
Why it sells: Clay keychains sell because they’re small, cheap to ship, and easy to buy as a gift. People also love them because they can add a name or an initial and make it feel personal.
Materials and tools: Air dry clay, acrylic roller or rolling pin, parchment paper, small cutters or a craft knife, needle tool or straw, sanding sponge or fine sandpaper, keychain hardware with split rings, jump rings, strong craft glue, acrylic paint or paint pens, and a clear matte or glossy sealer.
Pricing: $7-$19 for one keychain, or $22-$45 for a set of three.
Mistakes to avoid:
- Putting the hole too close to the edge, because it can crack
- Using thin clay, because it snaps in a bag
- Skipping sanding, because edges look rough
- Using weak rings, because it falls off
How to sell more:
- Offer name and initial options, because personalization raises the price fast
- Sell sets for friends, couples, or teams, because people love matching
- Add a charm add-on, like a tiny heart or star, for an easy upsell
- Package on a simple backing card, so it looks like a real gift
Where to sell: Online works great because keychains are easy to photograph and ship, and craft fairs work great near checkout because they’re an easy impulse buy.
How to create (step by step):
- Roll the clay on parchment paper until it’s smooth and even.
- Cut your shape, then smooth the edges with a damp finger.
- Make a hole for the ring using a straw or needle tool, and keep it away from the edge.
- Let the piece dry flat, then flip it once so it dries evenly.
- Sand the edges until they feel smooth in your hand.
- Paint or add details, then let everything dry fully.
- Seal both sides, and let the sealer cure completely.
- Add a jump ring, then attach the split ring and hardware.
- Do a gentle tug test, and make sure the ring is fully closed before selling.
You’ll also love this blog post: 35 Crafts That Sell Well And Make You Money
Clay bag charms
Why it sells: Clay bag charms sell because they make a plain bag feel personal and cute. People also buy them as small gifts, and they often grab two so they can match with a friend.
Materials and tools: Air dry clay, acrylic roller or rolling pin, parchment paper, small cutters or a craft knife, needle tool or toothpick, sanding sponge or fine sandpaper, jump rings, lobster clasp or key ring, short chain, strong craft glue, acrylic paint or paint pens, and a clear matte or glossy sealer.
Pricing: $10-$22 for one charm, or $26-$55 for a charm set with 3-5 pieces.
Mistakes to avoid:
- Making the charm too big, because it feels heavy on a bag
- Putting the hole too close to the edge, because it cracks
- Using weak rings, because the charm falls off
- Sealing only one side, because it can warp
How to sell more:
- Offer matching sets like charm plus keychain, because it raises order value
- Sell color packs like neutrals or bright brights, because buyers like easy choices
- Add initials or tiny symbols, because it feels custom
- Use clear style names, like “Wavy Heart” or “Mini Daisy,” so people pick fast
Where to sell: Online works well when you show it on a real bag in good light, and craft fairs work well because people can clip it on and feel the size.
How to create (step by step):
- Roll the clay on parchment paper until it’s smooth and even.
- Cut your shape, then smooth edges with a damp finger.
- Make a hole for the ring, and keep it away from the edge.
- Let the piece dry flat, then flip it once to dry evenly.
- Sand until the edges feel smooth and clean.
- Paint or add details, then let everything dry fully.
- Seal both sides, and let the sealer cure completely.
- Add jump rings, then attach the chain and lobster clasp.
- Do a gentle tug test, then clip it on a bag to check the hang.
Phone charms
Why it sells: Phone charms sell because people love making their phone feel like theirs. They’re also a small gift that feels fun, and buyers often grab more than one to switch styles.
Materials and tools: Air dry clay, acrylic roller or rolling pin, parchment paper, small cutters or a craft knife, needle tool or toothpick, sanding sponge or fine sandpaper, jump rings, phone charm strap or lanyard string, lobster clasp or small clasp, strong craft glue, acrylic paint or paint pens, and a clear matte or glossy sealer.
Pricing: $5–$15 for one charm, or $20-$45 for a set of three.
Mistakes to avoid:
- Making the charm too thick, because it gets heavy and clunky
- Making the hole too close to the edge, because it cracks
- Using weak rings, because it pops off in a bag
- Skipping sealer, because paint can rub off
How to sell more:
- Sell theme packs like hearts, fruits, or initials, because sets raise order value
- Offer matching phone and bag charm sets, because buyers love a full match
- Add a name or initial option, because it feels custom fast
- Show it on a real phone in your photos, so people see the size right away
Where to sell: Online works great because photos sell the vibe, and craft fairs work well because people can clip it on and buy fast.
How to create (step by step):
- Roll the clay on parchment paper until it’s smooth and even.
- Cut or shape your charm, then smooth the edges with a damp finger.
- Make a hole for the ring, and keep it away from the edge.
- Let it dry flat, then flip once so it dries evenly.
- Sand until it feels smooth in your hand.
- Paint or add details, then let it dry fully.
- Seal both sides, and let the sealer cure completely.
- Add a jump ring, then attach the charm strap or clasp.
- Do a gentle tug test, then clip it on a phone to check the hang.
Fridge magnet sets
Why it sells: Magnet sets sell because they feel like a small treat, and people love buying them as gifts. Sets also make buyers feel like they’re getting more value, so they spend more without overthinking it.
Materials and tools: Air dry clay, parchment paper, small sculpting tools, craft knife, sanding sponge or fine sandpaper, acrylic paint or paint pens, clear matte or glossy sealer, strong glue, flat magnets, and a ruler or coin for sizing.
Pricing: $14-$32 for a set of 6, or $24-$48 for a larger set of 10-12, depending on size and detail.
Mistakes to avoid:
- Using tiny weak magnets, because they slide down the fridge
- Gluing magnets on before sealing, because they can pop off
- Making the backs uneven, because they don’t sit flat
- Skipping cure time, because paint and sealer get scuffed
How to sell more:
- Sell themed sets like fruits, flowers, pets, or “kitchen icons,” because buyers love a clear theme
- Offer a bigger set as an upgrade, because it raises the order total fast
- Add a gift box option, because magnets are easy gifts
- Make a “mix and match” bundle, so buyers can build their own set
Where to sell: Online works well when you show the full set on a fridge, and craft fairs work well near checkout because magnets are an easy impulse buy.
How to create (step by step):
- Shape each magnet piece on parchment paper, and keep sizes consistent.
- Smooth the front and edges while the clay is still soft.
- Let pieces dry fully, and flip once so they dry evenly.
- Sand the backs flat, so they sit flush on the fridge.
- Paint your designs, then let the paint dry completely.
- Seal the front and sides, then let it cure all the way.
- Lightly sand the back again if needed, so glue grips better.
- Glue magnets to the back, then press firmly and let glue cure overnight.
- Test on a fridge with real paper, and swap to stronger magnets if it slips.
Clay plant markers
Why it sells: Clay plant markers sell because plant people love anything that makes their pots look cute and tidy. They also make an easy gift set, and buyers often grab more when they see matching herb names.
Materials and tools: Air dry clay, acrylic roller or rolling pin, parchment paper, craft knife, letter stamps or paint pen, sanding sponge or fine sandpaper, wooden skewers or thick wire for the stake, strong craft glue, clear sealer that’s water-resistant, and a small brush.
Pricing: $16-$34 for a set of 6 markers, or $28-$52 for a set of 12, based on size and how detailed the lettering is.
Mistakes to avoid:
- Making the stake too thin, because it snaps in soil
- Writing before the clay is fully dry, because letters smear
- Skipping a water-resistant sealer, because it gets ruined fast
- Gluing the stake into soft clay, because it loosens later
How to sell more:
- Sell herb sets like basil, mint, and rosemary, because they’re easy “yes” gifts
- Offer custom names, like “Mom’s Garden” or pet-safe plant labels
- Bundle with a mini magnet set or a small pot tag, for a higher order total
- Add a “care tip” line in your listing, like “wipe clean, don’t soak,” so buyers trust you
Where to sell: Online works well because plant sets ship easily, and craft fairs work great at spring markets and weekend vendor events.
How to create (step by step):
- Roll the clay on parchment paper until it’s even and smooth.
- Cut small label shapes, and smooth the edges with a damp finger.
- Let the labels dry until they’re firm, not soft.
- Add letters with stamps or a paint pen, and keep the words simple.
- Let everything dry fully, then sand edges for a clean look.
- Seal both sides, and let the sealer cure completely.
- Glue the label onto a wooden skewer or thick wire stake, and press firmly.
- Let the glue cure overnight, then test the marker in soil gently.
- Add one more thin seal coat if it will live outdoors most of the time.
Mini planters
Why it sells: Mini planters sell because they make any space feel cozy fast. People also buy them as gifts, and they love grabbing a set that matches their shelves or desk.
Materials and tools: Air dry clay, a small bowl or cup to use as a mold, acrylic roller or rolling pin, parchment paper, craft knife, smoothing tool or spoon, sanding sponge or fine sandpaper, clear sealer that’s water-resistant, a small brush, and felt pads for the bottom.
Pricing: $14–$30 for one mini planter, or $36–$72 for a set of three, depending on size and finish.
Mistakes to avoid:
- Making the walls too thin, because the planter cracks and chips
- Forgetting a drainage plan, because buyers ask about it
- Sealing only the outside, because moisture can soften it
- Not sanding the base flat, because it wobbles
How to sell more:
- Sell as sets of three in matching colors, because sets feel like decor upgrades
- Offer a “cache pot” version, which means it holds a plastic nursery pot inside
- Add a matching plant marker set, because it makes a perfect gift bundle
- Include simple care words, like “wipe clean, don’t soak,” so buyers feel safe
Where to sell: Online works well when you show the planter with a real plant inside, and craft fairs work well because people love picking colors in person.
How to create (step by step):
- Roll the clay into an even slab on parchment paper.
- Press the slab into a small bowl or cup to form the pot shape.
- Smooth the inside and rim, and keep the walls even.
- Let it dry in the mold until it holds its shape, then gently remove it.
- Let it dry fully, and flip it once so it dries evenly.
- Sand the rim and base until they feel smooth and sit flat.
- Seal the inside and outside, and let the sealer cure completely.
- Add felt pads to the bottom to protect surfaces.
- Test it with a nursery pot inside, so you can explain sizing clearly when selling.
Air-dry clay vases
Why it sells: Air-dry clay vases sell because they make a room look styled fast, even with just one stem. People also buy them as housewarming gifts, and they love a clean, simple shape that looks pricey.
Materials and tools: Air dry clay, a glass or plastic bottle to use as a form, acrylic roller or rolling pin, parchment paper, craft knife, smoothing tool or spoon, sanding sponge or fine sandpaper, acrylic paint or paint pens, and a clear sealer that’s water-resistant.
Pricing: $18-$45 for one small vase, or $44-$96 for a set of three bud vases, based on size and finish.
Mistakes to avoid:
- Trying to hold water inside, because air-dry clay isn’t truly waterproof
- Making the walls too thin, because tall pieces crack easier
- Skipping sanding, because vases show every rough spot
- Sealing only once, because paint can scuff over time
How to sell more:
- Sell it as a bud vase for dried flowers, because it avoids water issues
- Offer sets in matching shapes, because people love a “styled shelf” look
- Add a gift note option, because vases are popular for new homes
- Include a simple care line, like “dried flowers only,” so buyers trust you
Where to sell: Online works great when you show it styled on a shelf, and craft fairs work well because people can see the size and feel the texture.
How to create (step by step):
- Roll the clay into an even slab on parchment paper.
- Wrap the slab around a bottle form, and smooth the seam gently.
- Shape the top opening, and keep the rim even and clean.
- Let it dry on the form until it holds its shape, then slide it off carefully.
- Let it dry fully, and rotate it once so it dries evenly.
- Sand the outside and rim until it feels smooth to the touch.
- Paint or add texture details, then let it dry completely.
- Seal the whole vase, inside and out, and let it cure fully.
- Test it with dried stems, then take photos in bright light for selling.
Clay candle holders
Why it sells: Clay candle holders sell because they make any table look cozy fast. People also buy them as sets, because one candle holder looks nice, but two or three looks like real decor.
Materials and tools: Air-dry clay, acrylic roller or rolling pin, parchment paper, a real candle or tea light cup to size the hole, craft knife, smoothing tool or spoon, sanding sponge or fine sandpaper, felt pads, and a clear sealer that’s heat-safe for the outer surface.
Pricing: $12-$26 for one holder, or $32-$78 for a set of three, based on size and detail.
Mistakes to avoid:
- Making the candle hole too tight, because wax cups get stuck
- Placing a real flame against clay, because air-dry clay isn’t made for high heat
- Skipping felt pads, because it scratches tables
- Not sealing the surface, because wax and dust stain it
How to sell more:
- Sell sets of three in matching shapes, because it looks styled right away
- Offer a “tea light only” note, because it keeps it safe and clear
- Bundle with a matching coaster set or a mini trinket dish, for a higher order total
- Add gift packaging, because candle holders are easy gifts
Where to sell: Online works well when you show it styled with a candle, and craft fairs work well because people can pick the shape and size in person.
How to create (step by step):
- Roll the clay into an even slab on parchment paper.
- Cut a base shape, like a circle, oval, or arch.
- Use a candle or tea light cup to mark the center space, then shape the holder.
- Smooth edges and keep the base flat, so it won’t wobble.
- Let it dry fully, and flip it once so it dries evenly.
- Sand edges until they feel smooth and clean.
- Add felt pads to the bottom to protect surfaces.
- Seal the outside surface, and let the sealer cure completely.
- Test with a tea light cup, and make sure it sits stable before selling.
Clay incense holders
Why it sells: Clay incense holders sell because they turn a small daily habit into a cozy vibe, and people love decor that feels calm and “self-care” without trying hard.
Materials and tools: Air-dry clay, acrylic roller or rolling pin, parchment paper, craft knife, a straw or skewer for the hole, a small metal incense holder insert or metal clip, sanding sponge or fine sandpaper, acrylic paint or paint pens, and a clear matte or glossy sealer.
Pricing: $10-$22 for one holder, or $26-$58 for a set that includes a holder plus a matching ashtray.
Mistakes to avoid:
- Making the hole straight up, because incense sticks need a slight angle
- Skipping a metal insert, because heat can darken the clay over time
- Forgetting an ash catch area, because ash lands on the table
- Sealing too thick, because it can feel tacky and collect dust
How to sell more:
- Sell it as a set with a matching tray, because sets feel more “gift-ready”
- Offer styles like moon, wave, and simple arches, because buyers pick faster
- Add a small gift box upgrade, because this is a common gift item
- Make a “calm corner” bundle with a candle holder, because it raises the order total
Where to sell: Online works well when you show it styled on a shelf, and craft fairs work well because people love picking the shape in person.
How to create (step by step):
- Roll the clay on parchment paper until it’s smooth and even.
- Cut a base shape that can catch ash, like an oval or a long wave.
- Smooth the edges, and keep the base thick enough to stay strong.
- Use a skewer to make the incense hole at a slight angle.
- Press in a small metal insert or clip, so the stick sits in metal.
- Let it dry fully, and flip it once so it dries evenly.
- Sand the edges until they feel smooth to the touch.
- Paint or add details, then let everything dry completely.
- Seal the surface, let it cure fully, then test it with a real incense stick.
Clay soap dishes
Why it sells: Clay soap dishes sell because they make a bathroom feel put together fast. People also buy them as gifts, and they love matching sets that look clean and “spa” at home.
Materials and tools: Air-dry clay, acrylic roller or rolling pin, parchment paper, craft knife, a fork or skewer for drain lines, smoothing tool or spoon, sanding sponge or fine sandpaper, and a clear sealer that’s water-resistant.
Pricing: $12–$26 for one dish, or $34–$78 for a set of three, depending on size and finish.
Mistakes to avoid:
- Making it flat with no drain grooves, because soap turns mushy
- Not sealing well, because water breaks it down over time
- Leaving rough edges, because it looks messy in a bathroom
- Making it too thin, because it chips near the sink
How to sell more:
- Sell it as a bathroom set with a matching tray or small jar, because sets feel premium
- Offer “neutral” colors that match most bathrooms, because they sell easier
- Add a gift option, because soap dishes are easy housewarming gifts
- Include a care line like “wipe dry, don’t soak,” so buyers trust you
Where to sell: Online works well with bright bathroom photos, and craft fairs work well because people can feel the size and weight before buying.
How to create (step by step):
- Roll the clay on parchment paper until it’s smooth and even.
- Cut an oval or rectangle base, and smooth the edges.
- Add drain grooves with a fork or skewer, and keep them evenly spaced.
- Shape a slight lip around the edge, so the soap stays in place.
- Let it dry fully, and flip it once so it dries evenly.
- Sand edges until they feel smooth and clean.
- Seal the whole dish, top and bottom, and let it cure completely.
- Add a second thin coat of sealer for extra protection.
- Test it with a wet soap bar, then write clear care notes for buyers.
Clay spoon rests
Why it sells: Clay spoon rests sell because they solve a real kitchen mess in a cute way. People also buy them as gifts, and they love matching sets for a “put together” kitchen look.
Materials and tools: Air dry clay, acrylic roller or rolling pin, parchment paper, craft knife, a real spoon to size the curve, smoothing tool or spoon, sanding sponge or fine sandpaper, acrylic paint or paint pens, and a clear sealer that’s water-resistant.
Pricing: $14-$32 for one spoon rest, or $38-$84 for a set of 3-5, depending on size and detail.
Mistakes to avoid:
- Making it too small, because the spoon slides off
- Making the edges too thin, because they chip fast
- Not sealing well, because sauces stain the surface
- Letting it dry unevenly, because it warps
How to sell more:
- Sell “set of two” options, because people use more than one while cooking
- Offer simple kitchen colors, because they fit most homes
- Bundle with matching coasters or magnets, for a higher order total
- Add gift packaging, because kitchen items sell well as housewarming gifts
Where to sell: Online works well when you show it next to a pot or stove, and craft fairs work well because people love useful kitchen items they can touch.
How to create (step by step):
- Roll the clay on parchment paper until it’s smooth and even.
- Cut an oval or long shape that fits a spoon head and handle.
- Press a spoon gently into the clay to mark the curve.
- Raise the sides a little, so the spoon stays in place.
- Let it dry flat, and flip it once so it dries evenly.
- Sand edges until they feel smooth and clean.
- Paint or add details, then let everything dry fully.
- Seal the whole piece, and let it cure completely.
- Test it with a wet spoon, then wipe clean to check the finish.
Air-dry clay napkin rings
Why it sells: Napkin rings sell because they make a table look fancy with almost no effort. People also buy them as sets for hosting, and they’re an easy gift for anyone who loves home decor.
Materials and tools: Air dry clay, acrylic roller or rolling pin, parchment paper, a cup or small jar to use as a ring form, craft knife, smoothing tool or spoon, sanding sponge or fine sandpaper, acrylic paint or paint pens, and a clear matte or glossy sealer.
Pricing: $18-$42 for a set of 4, or $36-$78 for a set of 8, depending on detail and finish.
Mistakes to avoid:
- Making the ring too tight, because thick napkins won’t fit
- Making the ring too thin, because it cracks when used
- Not smoothing the seam, because it looks messy up close
- Sealing too thick, because it can feel sticky and grab lint
How to sell more:
- Offer sets of 4 and 8, because buyers host in different group sizes
- Sell color sets like neutral stone, soft pastels, or modern black and white
- Add a matching place card holder, because it raises the order total fast
- Package as a gift-ready set, because that’s a common reason people buy
Where to sell: Online works well when you show a full table photo, and craft fairs work well because people can picture it at home right away.
How to create (step by step):
- Roll the clay on parchment paper until it’s smooth and even.
- Cut a long strip that’s wide enough to look sturdy.
- Wrap the strip around a cup or jar to form the ring shape.
- Smooth the seam gently, and keep the ring even all around.
- Let it dry on the form until it holds its shape, then slide it off.
- Let it dry fully, and rotate it once so it dries evenly.
- Sand the surface until it feels smooth and clean.
- Paint or add details, then let everything dry fully.
- Seal it, let it cure completely, then test it with a real napkin.
Clay coaster sets
Why it sells: Coaster sets sell because they look cute and they protect tables, so buyers feel smart for buying them. People also love gifting them, because a set feels like a real present, not a random little thing.
Materials and tools: Air-dry clay, acrylic roller or rolling pin, parchment paper, round or square cutter or a craft knife, sanding sponge or fine sandpaper, acrylic paint or paint pens, clear sealer that’s water-resistant, cork sheets or felt pads, strong craft glue, and a ruler for sizing.
Pricing: $18-$38 for a set of 4, or $32-$64 for a set of 6, based on size, design, and finish.
Mistakes to avoid:
- Rolling them too thin, because they warp and crack
- Skipping cork or pads, because they slide and scratch tables
- Not sealing well, because cups leave rings and stains
- Drying them unevenly, because the edges curl up
How to sell more:
- Sell matching sets with a little holder, because it feels more premium
- Offer “mix and match” colors, because buyers love choices that still look neat
- Add a gift box upgrade, because coasters are easy housewarming gifts
- Bundle with a spoon rest or candle holder, because kitchen sets sell fast
Where to sell: Online works well when you show them under a real glass, and craft fairs work well because people can touch the weight and see the finish.
How to create (step by step):
- Roll the clay on parchment paper until it’s smooth and even.
- Cut 4 to 6 coaster shapes, and keep them the same size.
- Smooth the edges with a damp finger, so they look clean.
- Let them dry, and flip them once so they dry evenly.
- Sand the edges and tops until they feel smooth to the touch.
- Paint your design, and let it dry fully before sealing.
- Seal the top and sides, then let the sealer cure completely.
- Glue cork or felt to the bottom, then let the glue set overnight.
- Test with a cold glass and a hot mug, then check for slipping and stains.
Desk pen cups and pen holders
Why it sells: Desk pen cups and pen holders sell because people want their desk to look clean and cute. They also buy them as gifts for teachers, coworkers, and anyone who works at a desk.
Materials and tools: Air dry clay, a plain cup or jar to use as a base, acrylic roller or rolling pin, parchment paper, craft knife, smoothing tool or spoon, sanding sponge or fine sandpaper, strong craft glue, acrylic paint or paint pens, clear sealer that’s water-resistant, and felt pads.
Pricing: $16-$36 for one pen holder, or $38-$84 for a desk set that includes a pen holder plus a small tray.
Mistakes to avoid:
- Making the clay layer too thick, because it can crack as it dries
- Not smoothing the seam, because it looks messy up close
- Skipping felt pads, because it scratches desks
- Sealing too lightly, because pens can scuff the inside rim
How to sell more:
- Sell matching desk sets, like pen holder plus phone stand, because sets feel premium
- Offer name or initial options, because personalized desk items sell fast
- Keep colors simple, because neutral desk decor fits more buyers
- Show it styled with pens and a laptop, because photos do the selling
Where to sell: Online works well when you show it on a real desk setup, and craft fairs work well because people love useful gifts they can hold.
How to create (step by step):
- Roll the clay into an even slab on parchment paper.
- Measure your cup, then cut a clay wrap that fits around it.
- Wrap the clay around the cup base, and smooth the seam gently.
- Smooth the top edge, and keep the rim neat and even.
- Let it dry on the cup until it holds its shape, then slide it off carefully.
- Let it dry fully, and rotate it once so it dries evenly.
- Sand the outside and rim until it feels smooth and clean.
- Paint or add details, then let everything dry fully.
- Seal it, let it cure completely, then add felt pads to the bottom.
Clay business card holders
Why it sells: Business card holders sell because small business owners want their table to look professional, and they’ll pay for something that looks clean and branded.
Materials and tools: Air dry clay, acrylic roller or rolling pin, parchment paper, craft knife, ruler, sanding sponge or fine sandpaper, acrylic paint or paint pens, clear matte or glossy sealer, felt pads, and optional letter stamps for initials.
Pricing: A simple holder can sell for $14-$34, and a personalized holder or a set of two can sell for $32-$78.
Mistakes to avoid:
- Don’t make the slot too tight, because cards will bend.
- Don’t make the base too thin, because it tips over easily.
- Don’t skip sanding, because rough edges look cheap.
- Don’t seal too thick, because it can feel sticky.
How to sell more:
- You can offer initials or a logo-style symbol.
- You can sell matching sets for booth tables.
- You can bundle it with a pen holder.
- You can show it holding real cards.
Where to sell: These do well online with clean desk photos, and they also sell well at craft fairs and vendor markets where sellers shop for their own booths.
How to create (step by step):
- Roll the clay on parchment paper until it’s even.
- Cut a thick base rectangle for stability.
- Roll a second strip for the back wall.
- Attach the strip to the base securely.
- Press a card into the front gently.
- Remove the card and clean edges.
- Let it dry fully and evenly.
- Sand the edges until they feel smooth.
- Paint, seal, and add felt pads.
Clay phone stands
Why it sells: Clay phone stands sell because people want their phone upright for calls, videos, and recipes. They also buy them as gifts, because a cute desk item feels useful right away.
Materials and tools: Air dry clay, acrylic roller or rolling pin, parchment paper, craft knife, ruler, smoothing tool or spoon, sanding sponge or fine sandpaper, acrylic paint or paint pens, clear sealer that’s water-resistant, and felt pads.
Pricing: $12-$28 for one stand, or $28-$58 for a set of two, depending on size and finish.
Mistakes to avoid:
- Making the stand too light, because it tips over
- Cutting the slot too narrow, because phones don’t fit with a case
- Skipping a flat base, because it wobbles
- Not sealing the front edge, because it gets scuffed fast
How to sell more:
- Offer two sizes, one for phones and one for tablets
- Sell matching desk sets, like phone stand plus pen holder
- Add initials or a short word, because simple personalization sells
- Show it holding a real phone in your photos, so buyers trust the size
Where to sell: Online works well because photos show the use fast, and craft fairs work well because people can test their phone right there.
How to create (step by step):
- Roll the clay on parchment paper until it’s smooth and even.
- Cut a thick base shape, and keep it wide so it won’t tip.
- Shape the back support, and press it into the base securely.
- Create a phone slot, and make it wide enough for a phone case.
- Smooth the edges, and keep the angle around a gentle lean.
- Let it dry fully, and flip it once so it dries evenly.
- Sand all edges until they feel smooth and clean.
- Paint or add details, then let everything dry fully.
- Seal it, let it cure completely, then add felt pads to the bottom.
Book page holders
Why it sells: Book page holders sell because they make reading easier with one hand, and people love anything that feels like a tiny life upgrade. They’re also a great gift, because book lovers always think, “Wait, I need this.”
Materials and tools: Air dry clay, parchment paper, a rolling pin or acrylic roller, a craft knife, a ruler, a marker or pencil, a toothpick, sanding sponge or fine sandpaper, acrylic paint or paint pens, and a clear matte or glossy sealer.
Pricing: $5-$13 for one holder, or $20-$44 for a set of 5-7, depending on detail and finish.
Mistakes to avoid:
- Making it too tight, because it hurts the thumb
- Making it too thin, because it snaps fast
- Leaving rough edges, because it feels scratchy
- Skipping sealer, because paint rubs off
How to sell more:
- Offer sizes, because thumbs aren’t all the same
- Sell sets of two, because people read in more than one spot
- Add initials or a tiny symbol, because it feels personal
- Bundle with a bookmark set, because gifts sell easier
Where to sell: These do great online because they’re easy to ship and easy to show in photos, and they also sell well at craft fairs near journals, books, and gift tables.
How to create (step by step):
- Roll the clay on parchment paper until it’s even.
- Cut a thick rectangle, so it won’t break.
- Wrap it around your thumb gently, and mark the size.
- Shape a simple “V” groove on top for the pages.
- Smooth all edges, and make it comfy to hold.
- Let it dry fully, and flip it once to dry evenly.
- Sand until it feels smooth on skin.
- Paint details, and let them dry fully.
- Seal it well, then let it cure completely.
- Test it on a real book, and adjust the groove if needed.
Clay bookmarks
Why it sells: Clay bookmarks sell because they feel like a small gift that still looks special, and book lovers always want “one more” for the next read.
Materials and tools: Air dry clay, acrylic roller or rolling pin, parchment paper, craft knife, ruler, needle tool or straw for a hole, sanding sponge or fine sandpaper, acrylic paint or paint pens, clear matte or glossy sealer, and optional cord or tassel.
Pricing: $5-$15 for one bookmark, or $22-$48 for a themed set of 5.
Mistakes to avoid:
- Making it too thick, because it feels bulky in books
- Making it too thin, because it snaps fast
- Letting it dry unevenly, because it warps
- Putting the hole too close to the edge, because it cracks
- Skipping sealer, because paint can rub off
How to sell more:
- Sell sets by theme, like flowers, quotes, or cozy neutrals
- Offer name or initial options, because it feels personal fast
- Bundle with a book page holder, because gift sets sell easier
- Add a simple “teacher gift set” option, because it’s an easy yes
Where to sell: These do great online because they ship easy, and they also sell well at craft fairs, book events, and gift markets where people grab small presents.
How to create (step by step):
- Roll the clay on parchment paper until it’s smooth and even.
- Measure and cut a long rectangle, then keep the corners neat.
- Smooth the edges with a damp finger, so it feels clean.
- Add a hole at the top with a straw, and keep it centered.
- Let it dry flat on a hard surface, then flip it once to dry evenly.
- Sand the edges until they feel smooth on your fingers.
- Paint your design, then let it dry fully before sealing.
- Seal both sides, and let the sealer cure completely.
- Add cord or a tassel, then test it inside a book for fit.
Photo frame fronts and frame toppers
Why it sells: These sell because they turn a basic frame into a gift that feels personal and special, and people love giving framed photos for birthdays, new homes, and new babies.
Materials and tools: Air dry clay, acrylic roller or rolling pin, parchment paper, craft knife, small cutters, sanding sponge or fine sandpaper, strong craft glue, a plain photo frame, acrylic paint or paint pens, and a clear matte or glossy sealer.
Pricing: $16-$38 for one decorated frame front, or $36-$78 for a set of two, based on size and how detailed the design is.
Mistakes to avoid:
- Covering the whole frame in thick clay, because it can crack and feel heavy
- Gluing pieces on before they’re fully dry, because they can pop off later
- Skipping sanding, because the edges look messy up close
- Forgetting sealer, because paint can scuff with handling
How to sell more:
- Offer name and date options, because that makes it gift-ready
- Sell matching sets, like two frames for a couple or siblings
- Add a gift box upgrade, because people buy frames as presents
- Create a few theme styles, like baby, wedding, and housewarming
Where to sell: These do well online with a styled photo, and they also sell well at craft fairs because people can picture gifting them right away.
How to create (step by step):
- Pick a plain frame with a flat front.
- Roll clay on parchment until it’s even.
- Cut or shape small toppers, like flowers, bows, or arches.
- Test the layout on the frame without glue.
- Let the clay pieces dry fully and evenly.
- Sand the edges until they feel smooth.
- Paint your details, then let the paint dry.
- Seal the pieces, and let the sealer cure.
- Glue the pieces onto the frame, then press firmly.
- Let the glue cure overnight before selling.
Clay mirror frames
Why it sells: Clay mirror frames sell because they look like high end decor, but they still feel handmade and special. People buy them to upgrade a wall fast, and they also buy them as housewarming gifts.
Materials and tools: Air dry clay, acrylic roller or rolling pin, parchment paper, craft knife, sanding sponge or fine sandpaper, a small mirror tile or acrylic mirror, a backing board, strong craft glue, acrylic paint or paint pens, clear matte or glossy sealer, and a simple hanger or hanging wire.
Pricing: $28-$68 for one small mirror, or $58-$120 for a set of two, based on size and detail.
Mistakes to avoid:
- Making the frame too thick, because it can crack while drying
- Skipping a solid backing board, because it warps and bends
- Gluing before pieces fully cure, because parts can pop off
- Forgetting to seal the surface, because paint can scuff
How to sell more:
- Offer two sizes, like small and medium
- Sell matching sets, so walls look styled
- Add color options in neutrals, because they fit more homes
- Include simple hanging notes, so buyers feel safe
Where to sell: Online, because styled photos sell decor fast, and craft fairs, because people love touchable home pieces.
How to create (step by step):
- Place the mirror on a backing board.
- Trace it, then cut the base shape.
- Roll clay into an even slab.
- Cut frame shapes, like blobs or waves.
- Lay pieces around the mirror edge.
- Remove the clay pieces to dry.
- Let them dry fully and evenly.
- Sand edges until they feel smooth.
- Paint details, then let paint dry.
- Seal pieces, then let sealer cure.
- Glue the mirror to the base board.
- Glue the clay frame around the mirror.
- Attach a hanger, then let glue cure.
Wall hook plaques
Why it sells: Wall hook plaques sell because they fix everyday mess fast, and they also look like decor instead of clutter. People love them for entryways, kitchens, and kids’ rooms, because one small hook makes life feel calmer.
Materials and tools: Air-dry clay, acrylic roller or rolling pin, parchment paper, craft knife, texture tool or stamps, sanding sponge or fine sandpaper, small metal hooks, strong craft glue, a small backing board if you want extra strength, acrylic paint or paint pens, and a clear matte or glossy sealer.
Pricing: $18-$46 for one hook plaque, or $42-$98 for a set of two, depending on size, finish, and how many hooks you add.
Mistakes to avoid:
- Making the plaque too thin, because it can crack.
- Adding hooks before it’s fully cured, because they loosen later.
- Skipping a strong backing option, because heavy keys can pull.
- Forgetting to seal the surface, because paint can scuff.
How to sell more:
- Offer two versions, one hook and two hooks.
- Sell matching sets for entryway and kitchen.
- Add name options for kids’ hooks.
- Bundle with a matching keychain set.
Where to sell: These do well online with entryway photos, and they also sell well at craft fairs because people can picture them at home fast.
How to create (step by step):
- Roll the clay on parchment paper until it’s even.
- Cut a plaque shape, and keep edges clean.
- Add texture or simple raised details.
- Let it dry flat, then flip once.
- Sand edges until they feel smooth.
- Paint details, then let paint dry fully.
- Seal the front and sides, then let it cure.
- Attach the hooks with strong glue, and keep spacing even.
- If you use a backing board, glue the plaque onto it.
- Let everything cure overnight, then do a gentle tug test.
Name plaques and door signs
Why it sells: Name plaques and door signs sell because people love seeing their name on something, and it makes a space feel like theirs. They also make easy gifts for new homes, nurseries, and kids’ rooms.
Materials and tools: Air dry clay, acrylic roller or rolling pin, parchment paper, craft knife, ruler, letter stamps or a paint pen, sanding sponge or fine sandpaper, strong craft glue, a backing board if you want extra strength, a hanger or hanging wire, acrylic paint, and a clear matte or glossy sealer.
Pricing: $22-$54 for one sign, or $48-$110 for a pair, depending on size, finish, and personalization.
Mistakes to avoid:
- Making letters too small, because they’re hard to read from a distance
- Adding text before the clay is firm, because it smears and looks messy
- Skipping a backing board on larger signs, because they can warp
- Not sealing well, because door signs get scuffed
How to sell more:
- Offer popular styles like clean modern, boho, or cute kids themes
- Add optional extras like hearts, stars, or a small icon, because it feels custom
- Sell family sets, like “kitchen” plus “bathroom,” for a higher order total
- Ask for name details in a simple order form, so buyers feel safe
Where to sell: Online works great because personalization sells through photos, and craft fairs work well because people order custom names on the spot.
How to create (step by step):
- Roll the clay on parchment paper until it’s smooth and even.
- Cut your sign shape, and keep edges clean.
- Let the clay sit until it feels firm, not soft.
- Add the name with stamps or a paint pen, and keep spacing even.
- Let it dry fully, and flip it once so it dries evenly.
- Sand edges until they feel smooth and clean.
- Paint the background or details, then let paint dry fully.
- Seal the front and sides, then let the sealer cure completely.
- Glue the sign onto a backing board if it’s large, for strength.
- Attach a hanger, then let everything cure overnight.
You’ll love this article: 37 Profitable Crafts to Make and Sell for Extra Cash
Conclusion
You’ve got 27 different clay ideas here, and each one can turn into real sales if you keep it simple and actually finish what you start.
Pick one product, make a small batch, then sell it in two places, online and at a craft fair, so you learn faster. Don’t wait for perfect tools or perfect timing, because your first listings are supposed to feel a little messy.
And if you make a mistake, just know that’s normal, and it’s how you get better fast.
Save this post so you can come back to these clay ideas anytime you need your next best seller.