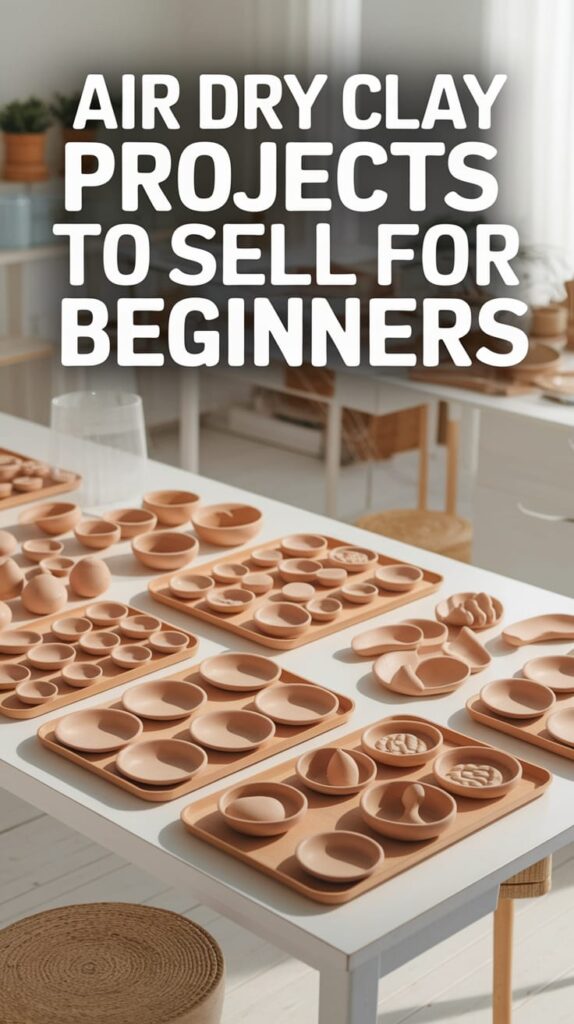
You’re here because you want to make extra cash with something fun, and these air dry clay projects are perfect for that.
They’re simple, cute, and don’t need fancy tools or a big budget. You’ll find beginner-friendly ideas that look good enough to charge for and easy enough to actually finish.
I’ll show you which ones sell fast, how to make them look clean, and what mistakes to avoid. By the end of this post, you’ll pick one idea and turn it into profit.

This post includes affiliate links to products I love and recommend, meaning I may receive a small commission at no extra cost to you. Please read full disclosure for more information.
Pick your first project fast
If you pick the wrong first idea, you’ll quit fast. Start by choosing one simple idea based on your level (beginner, intermediate, or advanced) and the amount of time you have.
Choose your idea today using this quick filter.
- If you only have 30 to 60 minutes, pick something small and flat.
- If you have 2 to 3 hours, pick something you can batch in sets.
- If your budget is tight, pick one shape and repeat it.
- If you’re nervous about selling, pick gift items people already understand.
What sells best for beginners and why
- Small sets sell fast, because they feel like more value.
- Flat items sell more easily because shipping is simpler.
- Useful items sell well because people use them daily.
- Simple shapes sell more because they look clean in photos.
Easy air dry clay projects usually have 3 things in common. They’re small and they don’t need perfect sculpting skills.
What you need before you start
You don’t need a big craft room. You need a small setup that keeps your crafts smooth and your finish clean.
Materials list that covers most projects:
- Air dry clay that is good quality.
- Acrylic paint or paint pens for simple details.
- A clear sealer, matte or glossy, for a finished look.
- Strong craft glue for magnets and hardware.
- Parchment paper so clay lifts clean.
Tools list that keeps costs low:
- Rolling pin or acrylic roller for even thickness.
- Craft knife for clean cuts.
- Toothpick or needle tool for holes and details.
- Sanding sponge or fine sandpaper for smooth edges.
- A ruler for quick size checks.
Workspace setup and drying basics:
- Work on parchment paper on a flat table.
- Keep a small cup of water nearby.
- Dry pieces on a flat surface, not a towel.
- Flip pieces once they’re firm, so both sides dry evenly.
- Keep thick pieces out of humid rooms.
Sealing and paint basics for a clean finish:
- Sand first, then paint, then seal.
- Paint in thin layers, so it looks smooth.
- Seal both sides, so the pieces dry evenly.
- Let the sealer cure fully before packing.
Make it look store-ready
This part is what separates “cute craft” from “I’d pay for that.” You don’t need talent here; you need simple rules.
Thickness rules that cut down cracks:
- Keep most pieces evenly thick across the whole shape.
- Avoid super thin edges, because they chip fast.
- Don’t rush drying with heat, because it warps.
Sanding and smoothing steps:
- Let pieces dry fully before sanding.
- Sand edges first, then sand flat areas lightly.
- Wipe dust off before painting anything.
Paint and color choices that look clean:
- Use fewer colors per piece for a modern look.
- Pick one style per batch, so sets match.
- Keep details simple, because messy lines show.
Sealing rules so the finish lasts:
- Seal in thin layers, not thick coats.
- Let each layer dry fully before the next.
- Seal the back too, even if it’s plain.
Quality checklist before you sell:
- The edges feel smooth to the touch.
- The piece sits flat and doesn’t wobble.
- The paint looks even and not streaky.
- The sealer feels dry and not tacky.
- Any hardware feels tight and secure.
Easy air dry clay projects
Magnet sets in themes
Why it sells: People buy magnet sets because they’re small, cute, and useful, and they feel like an easy yes price.
Materials and tools: Air dry clay, acrylic roller or rolling pin, parchment paper, clay cutters or a craft knife, needle tool or toothpick, sanding sponge or fine sandpaper, small magnets, strong craft glue, acrylic paint or paint pens, and a clear matte or glossy sealer.
Pricing: $8-$18 per set, or $18-$35 for a 2-set bundle.
Mistakes to avoid:
- Making pieces too thick, because they dry unevenly
- Gluing magnets before sealing, because they pop off
- Skipping sanding, because rough edges look cheap
- Using weak glue, because magnets fall off
How to sell more:
- Sell themed sets like fruit, flowers, or smiley faces
- Offer mix and match bundles
- Add a tiny care card, so buyers trust you more
Where to sell: Etsy and other online marketplaces where photos do the selling, or craft fairs where people grab small gifts fast.
How to create (step by step):
- Roll the clay on parchment paper until it’s smooth and even.
- Cut your shapes with cutters or a clean craft knife.
- Let pieces dry flat, then flip once so they dry evenly.
- Sand edges gently until they feel smooth to the touch.
- Paint or add details, then let everything dry fully.
- Seal both sides, then let the sealer cure completely.
- Glue magnets on the back and let them set fully.
Mini trinket dishes
Why it sells: People buy trinket dishes because they’re useful for rings, coins, and keys, and they’re an easy gift people don’t overthink.
Materials and tools: Air dry clay, acrylic roller or rolling pin, parchment paper, bowl or small dish for shaping, craft knife, sanding sponge or fine sandpaper, acrylic paint or paint pens, and a clear matte or glossy sealer.
Pricing: $10-$24 per dish, or $22-$45 for a 2-dish gift set.
Mistakes to avoid:
- Pulling the clay off the mold too early, because it warps
- Leaving fingerprints on the surface
- Skipping sanding, because rough edges look cheap
- Sealing only one side, because it curls
How to sell more:
- Offer initials or short words as a paid add-on
- Sell matching sets in neutral colors
- Add a simple gift box option
Where to sell: Etsy and other online marketplaces, or craft fairs where people buy gifts on the spot.
How to create (step by step):
- Roll the clay on parchment paper until it’s smooth and even.
- Cut a circle or soft shape with a craft knife.
- Place the clay over a bowl mold lined with parchment or plastic wrap.
- Let it set, then remove and let it dry fully.
- Sand edges gently until smooth.
- Paint or add details, then let everything dry fully.
- Seal both sides and let the sealer cure completely.
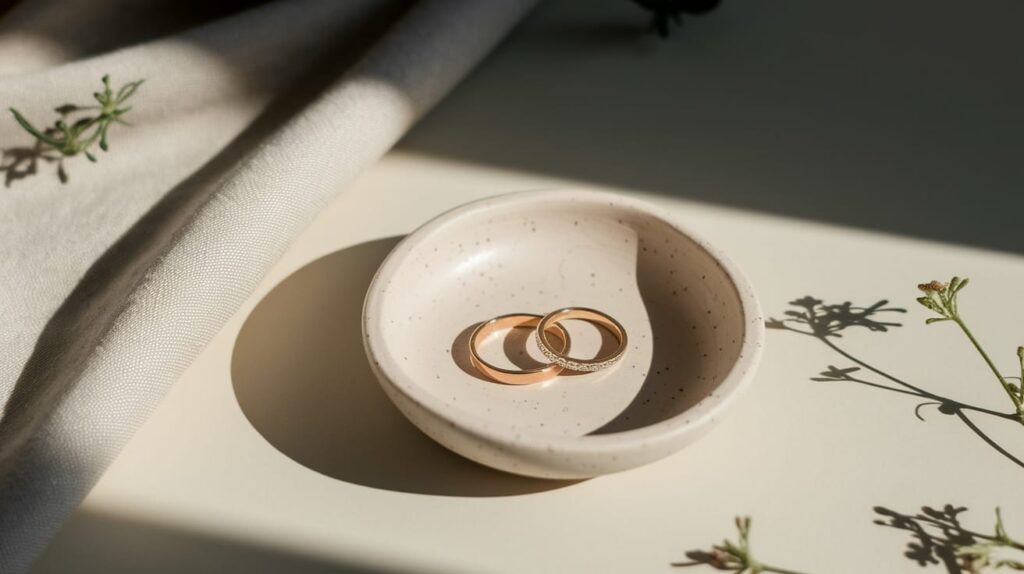
Ring dishes
Why it sells: Ring dishes sell because people always need a place to drop jewelry, and they’re a popular gift for birthdays and weddings.
Materials and tools: Air dry clay, acrylic roller or rolling pin, parchment paper, small bowl mold, sanding sponge or fine sandpaper, acrylic paint or paint pens, and a clear matte or glossy sealer.
Pricing: $12-$28 per dish, or $28-$55 for a 2-dish set.
Mistakes to avoid:
- Making edges uneven, because it looks messy
- Using too much paint, because it chips
- Packing before the sealer fully cures
How to sell more:
- Offer name or date personalization
- Sell wedding or bridesmaid sets
- Bundle two dishes as a gift set
Where to sell: Etsy, wedding markets, and craft fairs.
How to create (step by step):
- Roll the clay evenly on parchment paper.
- Cut a small circle for the base.
- Shape it over a bowl mold.
- Let it dry until firm, then remove and dry fully.
- Sand edges until smooth.
- Paint or decorate, then let dry.
- Seal both sides and let it cure.
Keychains and bag charms
Why it sells: Keychains and charms sell because they feel personal, lightweight, and are easy impulse buys.
Materials and tools: Air dry clay, acrylic roller or rolling pin, parchment paper, clay cutters or craft knife, toothpick or needle tool, sanding sponge or fine sandpaper, jump rings, keychain hardware, strong craft glue, acrylic paint or paint pens, and a clear sealer.
Pricing: $8-$20 each, or $18-$40 for a 2-piece set.
Mistakes to avoid:
- Making holes too close to the edge, because they break
- Adding hardware before sealing
- Skipping sanding, because edges look rough
How to sell more:
- Offer initials, numbers, or simple icons
- Sell matching pairs or bundles
- Add gift tags as an upsell
Where to sell: Etsy and craft fairs.
How to create (step by step):
- Roll the clay on parchment paper until smooth.
- Cut shapes with cutters or a clean craft knife.
- Make holes for jump rings using a toothpick.
- Let pieces dry flat, then flip once.
- Sand edges gently until smooth.
- Paint or add details, then let dry.
- Seal both sides and let cure.
- Attach hardware and test gently.
Coaster sets
Why it sells: Coaster sets sell because they feel useful, giftable, and people like buying them in matching sets.
Materials and tools: Air dry clay, acrylic roller or rolling pin, parchment paper, ruler, craft knife, sanding sponge or fine sandpaper, acrylic paint, and a clear sealer.
Pricing: $18-$40 per set, or $35-$70 for two sets.
Mistakes to avoid:
- Uneven thickness, because coasters wobble
- Not sealing both sides
- Rushing dry time
How to sell more:
- Sell neutral color sets for home decor
- Offer themed sets for holidays
- Bundle with a gift box option
Where to sell: Etsy, home decor markets, and craft fairs.
How to create (step by step):
- Roll the clay evenly on parchment paper.
- Measure and cut coaster shapes.
- Let them dry flat, flipping once.
- Sand edges until smooth.
- Paint or decorate, then let dry fully.
- Seal both sides and let the sealer cure.
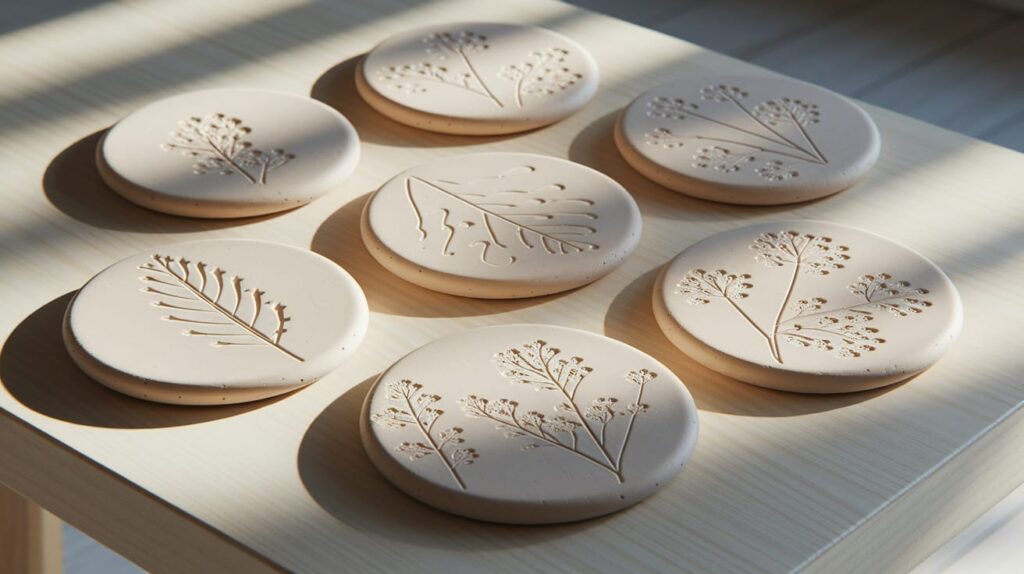
Photo holders
Why it sells: People buy photo holders for desks, events, and gifts, and they’re small enough to feel like an easy add-on purchase.
Materials and tools: Air dry clay, acrylic roller or rolling pin, parchment paper, craft knife, sanding sponge or fine sandpaper, wire or photo clip, strong craft glue, acrylic paint or paint pens, and a clear matte or glossy sealer.
Pricing: $8-$18 each, or $18-$36 for a 2-piece set.
Mistakes to avoid:
- Making the base too light, because it tips over
- Cutting the slot too wide, because photos slip
- Skipping sealer, because the surface scuffs
How to sell more:
- Sell sets for weddings or parties
- Offer custom colors for events
- Bundle with name cards or table numbers
Where to sell: Etsy and other online marketplaces, or craft fairs where people buy desk and gift items.
How to create (step by step):
- Roll the clay on parchment paper until it’s smooth and even.
- Shape a thick base that can stand on its own.
- Add a slot or press in the wire clip.
- Let the piece dry fully, then flip once.
- Sand edges gently until smooth.
- Paint or add details, then let everything dry fully.
- Seal both sides and let the sealer cure completely.
Plant markers
Why it sells: Plant lovers buy plant markers in sets, especially for herbs and garden gifts.
Materials and tools: Air dry clay, acrylic roller or rolling pin, parchment paper, craft knife, sanding sponge or fine sandpaper, paint pens, and a clear matte or glossy sealer.
Pricing: $6-$14 per set, or $14-$28 for two sets.
Mistakes to avoid:
- Making stems too thin, because they snap
- Writing names too small, because they’re hard to read
- Skipping sealer, because moisture damages them
How to sell more:
- Sell herb, veggie, or houseplant sets
- Offer custom labels as a paid add-on
- Bundle with small pots or plant gifts
Where to sell: Craft fairs, garden markets, and online shops.
How to create (step by step):
- Roll the clay evenly on parchment paper.
- Cut long marker shapes with a craft knife.
- Add plant names using stamps or paint pens.
- Let pieces dry flat, flipping once.
- Sand edges gently until smooth.
- Seal both sides and let the sealer cure completely.
Mini name tags for baskets and jars
Why it sells: People love an organization that looks cute and matches their home style.
Materials and tools: Air dry clay, acrylic roller or rolling pin, parchment paper, craft knife, sanding sponge or fine sandpaper, paint pens, string or twine, and a clear matte or glossy sealer.
Pricing: $5-$12 each, or $12-$24 for a set.
Mistakes to avoid:
- Writing too small, because it looks messy
- Sealing too thick, because it stays tacky
- Using weak string, because it snaps
How to sell more:
- Sell pantry, laundry, or toy bin sets
- Offer custom words or fonts
- Bundle tags in matching styles
Where to sell: Etsy, home organization shops, and craft fairs.
How to create (step by step):
- Roll the clay on parchment paper until smooth.
- Cut tag shapes with a craft knife.
- Make holes for string using a toothpick.
- Let pieces dry flat, flipping once.
- Sand edges gently until smooth.
- Write labels with paint pens.
- Seal both sides and let the sealer cure completely.
Modern diy mini air dry clay pot
Why it sells: Mini pots feel modern, giftable, and easy to style on desks and shelves.
Materials and tools: Air dry clay, acrylic roller or rolling pin, parchment paper, craft knife, small cup or jar mold, sanding sponge or fine sandpaper, acrylic paint, and a clear matte or glossy sealer.
Pricing: $10-$26 per pot, or $24-$50 for a 2-pot set.
Mistakes to avoid:
- Making walls too thin, because they crack
- Rushing dry time, because the pot warps
- Forgetting to seal the inside surface
How to sell more:
- Sell matching sets in neutral colors
- Bundle with faux plants or dried stems
- Offer name tags as an add-on
Where to sell: Craft fairs, gift shops, and online marketplaces.
How to create (step by step):
- Roll the clay evenly on parchment paper.
- Cut a long strip for the sides and a circle for the base.
- Wrap the strip around a small mold and smooth the seam.
- Attach the base and smooth the edges.
- Let the pot dry fully before removing the mold.
- Sand edges gently until smooth.
- Paint or decorate, then let dry fully.
- Seal inside and outside and let the sealer cure completely.
Mini clay ideas
Tiny charm packs
Why it sells: People love small charm packs because they feel fun, collectible, and easy to gift or add onto an order.
Materials and tools: Air dry clay, acrylic roller or rolling pin, parchment paper, clay cutters or a craft knife, toothpick or needle tool, sanding sponge or fine sandpaper, paint pens or acrylic paint, and a clear matte or glossy sealer.
Pricing: $6-$14 per pack, or $14-$28 for two packs.
Mistakes to avoid:
- Making charms too thin, because they snap
- Adding too much detail, because it looks messy
- Skipping sanding on tiny edges
How to sell more:
- Sell themed packs like hearts, stars, or flowers
- Offer mystery packs for fun
- Bundle charm packs with keychains or gift tags
Where to sell: Etsy, craft fairs, and as add-ons in online shops.
How to create (step by step):
- Roll the clay on parchment paper until smooth and even.
- Cut small shapes with cutters or a clean craft knife.
- Add holes if the charms will hang.
- Let pieces dry flat, then flip once.
- Sand edges gently until smooth.
- Add details with paint or pens and let dry.
- Seal both sides and let the sealer cure completely.
Mini desk tokens
Why it sells: Mini desk tokens sell because people like small positive items they can keep on their desk.
Materials and tools: Air dry clay, acrylic roller or rolling pin, parchment paper, craft knife, sanding sponge or fine sandpaper, letter stamps or paint pens, and a clear matte or glossy sealer.
Pricing: $5-$12 each, or $12-$24 for a set.
Mistakes to avoid:
- Writing words too small
- Making the base uneven, because it wobbles
- Sealing too thick, because it stays sticky
How to sell more:
- Sell word sets like calm, focus, or breathe
- Offer custom words as an add-on
- Bundle with small gift pouches
Where to sell: Craft fairs, gift shops, and online marketplaces.
How to create (step by step):
- Roll the clay evenly on parchment paper.
- Cut small circles or soft shapes.
- Smooth edges with a damp finger.
- Let pieces dry fully, flipping once.
- Sand edges gently until smooth.
- Add words with stamps or pens.
- Seal both sides and let the sealer cure completely.
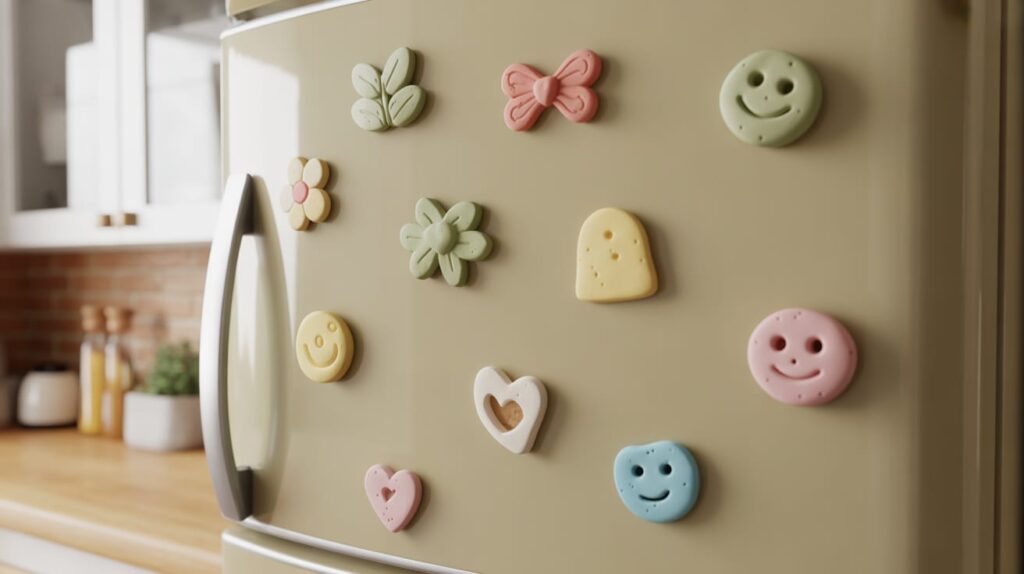
Tiny fridge icons
Why it sells: Tiny fridge icons sell because they’re cute, useful, and easy impulse buys.
Materials and tools: Air dry clay, acrylic roller or rolling pin, parchment paper, clay cutters or craft knife, sanding sponge or fine sandpaper, small magnets, strong craft glue, paint or paint pens, and a clear sealer.
Pricing: $6-$14 per set, or $14-$28 for two sets.
Mistakes to avoid:
- Making icons too thick
- Gluing magnets before sealing
- Skipping sanding on small edges
How to sell more:
- Sell icon sets like food, chores, or reminders
- Offer custom icons as a paid add-on
- Bundle with memo boards or planners
Where to sell: Etsy and craft fairs.
How to create (step by step):
- Roll the clay on parchment paper until smooth.
- Cut small icon shapes.
- Let pieces dry flat, flipping once.
- Sand edges gently until smooth.
- Paint simple designs and let dry.
- Seal both sides and let cure.
- Glue magnets on the back and let set fully.
Mini figures that sit flat
Why it sells: Flat-bottom figures sell because they’re cute, stable, and easy to display.
Materials and tools: Air dry clay, parchment paper, toothpick or needle tool, sanding sponge or fine sandpaper, paint pens or acrylic paint, and a clear matte or glossy sealer.
Pricing: $6-$16 each, or $18-$45 for a small set.
Mistakes to avoid:
- Making legs too thin, because they break
- Not flattening the base
- Adding too many tiny details
How to sell more:
- Sell themed sets like animals or characters
- Offer pick-your-set bundles
- Add name tags for personalization
Where to sell: Craft fairs and online shops.
How to create (step by step):
- Shape a simple body with a flat base.
- Add small details with a toothpick.
- Let the figure dry fully, flipping once.
- Sand rough spots gently.
- Add paint or pen details.
- Seal and let the sealer cure completely.
Small gift tag add ons
Why it sells: Gift tags sell because people love small details that make gifts feel special.
Materials and tools: Air dry clay, acrylic roller or rolling pin, parchment paper, craft knife, toothpick or straw, sanding sponge or fine sandpaper, paint pens, string or twine, and a clear matte or glossy sealer.
Pricing: $5-$12 per set, or $12-$24 for two sets.
Mistakes to avoid:
- Making holes too close to the edge
- Writing names too small
- Sealing too thick
How to sell more:
- Offer holiday or event themed tags
- Bundle tags with gift sets
- Sell blank and personalized versions
Where to sell: Etsy, craft fairs, and as add-ons in online shops.
How to create (step by step):
- Roll the clay evenly on parchment paper.
- Cut small tag shapes.
- Make holes using a straw or toothpick.
- Let pieces dry flat, flipping once.
- Sand edges gently until smooth.
- Write names or designs with pens.
- Seal both sides and let the sealer cure completely.
Cute air dry clay ideas
Scallop edge trays
Why it sells: Scallop trays sell because they look decorative and giftable, but they’re still useful for jewelry and small items.
Materials and tools: Air dry clay, acrylic roller or rolling pin, parchment paper, craft knife, bowl mold, sanding sponge or fine sandpaper, acrylic paint, and a clear matte or glossy sealer.
Pricing: $14-$32 per tray, or $30-$60 for a matching set.
Mistakes to avoid:
- Cutting uneven scallops, because it looks messy
- Removing the tray from the mold too early
- Skipping sanding on the edges
How to sell more:
- Offer matching trays in two sizes
- Sell neutral color sets
- Add a gift box option
Where to sell: Etsy, home decor shops, and craft fairs.
How to create (step by step):
- Roll the clay evenly on parchment paper.
- Cut a circle, then trim scallop edges.
- Place the clay over a bowl mold.
- Let it set, then remove and dry fully.
- Sand edges gently until smooth.
- Paint and let dry.
- Seal both sides and let the sealer cure completely.
Wavy catchall trays
Why it sells: Wavy trays sell because they feel modern and decorative while still being useful.
Materials and tools: Air dry clay, acrylic roller or rolling pin, parchment paper, craft knife, bowl mold, sanding sponge or fine sandpaper, acrylic paint, and a clear matte or glossy sealer.
Pricing: $14-$30 per tray, or $28-$55 for a set.
Mistakes to avoid:
- Making waves uneven, because it looks sloppy
- Leaving fingerprints on the surface
- Sealing too thick
How to sell more:
- Offer sets in soft neutral colors
- Sell as desk or entryway trays
- Bundle with ring dishes
Where to sell: Etsy and craft fairs.
How to create (step by step):
- Roll the clay evenly on parchment paper.
- Cut a circle or oval shape.
- Gently pinch edges into soft waves.
- Let the tray dry on a flat surface.
- Sand edges until smooth.
- Paint and let dry fully.
- Seal and let the sealer cure completely.
Terrazzo style pieces
Why it sells: Terrazzo pieces sell because they look trendy and high end but are simple to batch.
Materials and tools: Air dry clay, acrylic roller or rolling pin, parchment paper, craft knife, sanding sponge or fine sandpaper, small clay scraps, acrylic paint, and a clear matte or glossy sealer.
Pricing: $12-$28 per piece, or $30-$60 for a small set.
Mistakes to avoid:
- Using too many colors
- Making terrazzo pieces too thick
- Skipping sanding after drying
How to sell more:
- Sell matching sets like trays and dishes
- Offer neutral terrazzo colorways
- Bundle as gift sets
Where to sell: Etsy, gift shops, and home decor markets.
How to create (step by step):
- Roll a base layer of clay evenly.
- Press small clay bits into the surface.
- Roll lightly to flatten everything together.
- Let the piece dry fully.
- Sand the surface until smooth.
- Paint if needed and let dry.
- Seal and let the sealer cure completely.
Bow and heart sets
Why it sells: Bow and heart sets sell because they feel cute, giftable, and popular year-round.
Materials and tools: Air dry clay, acrylic roller or rolling pin, parchment paper, clay cutters or craft knife, sanding sponge or fine sandpaper, acrylic paint or paint pens, and a clear matte or glossy sealer.
Pricing: $10-$22 per set, or $22-$45 for two sets.
Mistakes to avoid:
- Making bows too thin
- Overpainting small details
- Skipping sanding on edges
How to sell more:
- Sell matching bow and heart sets
- Offer pastel and neutral color options
- Bundle as gift packs
Where to sell: Etsy, craft fairs, and gift shops.
How to create (step by step):
- Roll the clay evenly on parchment paper.
- Cut bow or heart shapes.
- Smooth edges gently.
- Let pieces dry flat, flipping once.
- Sand edges until smooth.
- Paint details and let dry.
- Seal and let the sealer cure completely.
Cute matching bundles for photos
Why it sells: Matching bundles sell because they photograph well and feel like a full collection.
Materials and tools: Air dry clay, acrylic roller or rolling pin, parchment paper, craft knife, sanding sponge or fine sandpaper, acrylic paint, and a clear matte or glossy sealer.
Pricing: $20-$45 per bundle, depending on the number of pieces.
Mistakes to avoid:
- Mixing too many styles in one bundle
- Using clashing colors
- Not sanding everything evenly
How to sell more:
- Create color-themed bundles
- Sell limited edition sets
- Use clean flat lay photos
Where to sell: Etsy and online marketplaces where photos matter most.
How to create (step by step):
- Choose one color palette.
- Make all pieces using the same thickness.
- Let everything dry fully.
- Sand all pieces at once.
- Paint and let dry.
- Seal all pieces together and let cure.
Air dry clay ideas featuring animals
Paw print magnets
Why it sells: Pet lovers buy paw prints because they’re personal, cute, and easy gifts.
Materials and tools: Air dry clay, acrylic roller or rolling pin, parchment paper, paw cutter or craft knife, sanding sponge or fine sandpaper, small magnets, strong craft glue, acrylic paint or paint pens, and a clear matte or glossy sealer.
Pricing: $10-$22 per set, or $22-$45 for two sets.
Mistakes to avoid:
- Making paw pads too thick
- Gluing magnets before sealing
- Painting tiny details that look messy
How to sell more:
- Offer dog and cat versions
- Sell sets in neutral colors
- Add name personalization as an add-on
Where to sell: Etsy and craft fairs.
How to create (step by step):
- Roll the clay evenly on parchment paper.
- Cut paw shapes and smooth edges.
- Let pieces dry flat, flipping once.
- Sand edges gently until smooth.
- Paint simple details and let dry.
- Seal both sides and let the sealer cure completely.
- Glue magnets on the back and let them set fully.

Tiny pet charms
Why it sells: Pet charms sell because they’re small, personal, and easy to attach to keys or bags.
Materials and tools: Air dry clay, acrylic roller or rolling pin, parchment paper, craft knife, toothpick or needle tool, sanding sponge or fine sandpaper, jump rings, strong craft glue, acrylic paint or paint pens, and a clear sealer.
Pricing: $6-$16 each, or $18-$40 for a small set.
Mistakes to avoid:
- Making holes too close to the edge
- Adding too many painted details
- Skipping sanding
How to sell more:
- Offer dog, cat, or farm animal sets
- Sell matching charm pairs
- Bundle with keychains
Where to sell: Etsy and craft fairs.
How to create (step by step):
- Roll the clay evenly on parchment paper.
- Cut simple animal shapes.
- Add a hole for the jump ring.
- Let pieces dry flat, flipping once.
- Sand edges gently until smooth.
- Paint minimal details and let dry.
- Seal both sides and let cure.
- Attach jump rings and test gently.
Simple animal desk buddies
Why it sells: Desk buddies sell because they feel cute, friendly, and collectible.
Materials and tools: Air dry clay, parchment paper, toothpick or needle tool, sanding sponge or fine sandpaper, acrylic paint or paint pens, and a clear matte or glossy sealer.
Pricing: $6-$18 each, or $20-$48 for a set.
Mistakes to avoid:
- Making legs too thin
- Not flattening the base
- Overpainting faces
How to sell more:
- Sell themed sets like forest or farm animals
- Offer pick-your-set bundles
- Add name tags
Where to sell: Craft fairs and online shops.
How to create (step by step):
- Shape a simple body with a flat base.
- Add small features with a toothpick.
- Let the figure dry fully, flipping once.
- Sand rough spots gently.
- Paint simple details and let dry.
- Seal and let the sealer cure completely.
Animal-themed ring dishes
Why it sells: Animal ring dishes sell because they mix cute decor with everyday use.
Materials and tools: Air dry clay, acrylic roller or rolling pin, parchment paper, bowl mold, sanding sponge or fine sandpaper, acrylic paint, and a clear matte or glossy sealer.
Pricing: $12-$28 per dish, or $28-$55 for two.
Mistakes to avoid:
- Adding too much raised detail
- Pulling off the mold too early
- Skipping sanding on edges
How to sell more:
- Offer cat, dog, or bunny designs
- Sell matching sets
- Bundle as gifts
Where to sell: Etsy and gift markets.
How to create (step by step):
- Roll the clay evenly on parchment paper.
- Cut a dish shape and add simple ears or details.
- Place over a bowl mold.
- Let it set, then remove and dry fully.
- Sand edges gently.
- Paint and let dry.
- Seal both sides and let cure.
Animal ornament sets
Why it sells: Animal ornaments sell well during holidays and as nursery decor.
Materials and tools: Air dry clay, acrylic roller or rolling pin, parchment paper, cutters or craft knife, straw or toothpick, sanding sponge or fine sandpaper, paint, ribbon, and a clear sealer.
Pricing: $14-$38 per set, or $35-$75 for two sets.
Mistakes to avoid:
- Making holes too close to the edge
- Packing before fully cured
- Using thin ribbon
How to sell more:
- Sell woodland or farm sets
- Offer name personalization
- Bundle in gift boxes
Where to sell: Holiday markets, Etsy, and online shops.
How to create (step by step):
- Roll the clay evenly on parchment paper.
- Cut animal shapes.
- Make hanging holes with a straw.
- Let pieces dry flat, flipping once.
- Sand edges gently until smooth.
- Paint details and let dry.
- Seal and let the sealer cure completely.
- Add ribbon and pack carefully.
Making jewelry with air dry clay
Earrings that batch fast
Why it sells: Earrings sell fast because they’re lightweight, giftable, and easy for buyers to say yes to.
Materials and tools: Air dry clay, acrylic roller or rolling pin, parchment paper, clay cutters or a craft knife, needle tool or toothpick, sanding sponge or fine sandpaper, jump rings, earring hooks or posts, strong craft glue, acrylic paint or paint pens, and a clear matte or glossy sealer.
Pricing: $12-$28 per pair, or $30-$55 for a 2-pair gift set.
Mistakes to avoid:
- Rolling the clay too thin, because it cracks fast
- Skipping sanding, because rough edges look cheap
- Adding hardware before it’s fully dry and sealed
- Forgetting sealer, so paint rubs off
How to sell more:
- Sell mini collections like neutrals or pastels
- Offer clip-on options for non-pierced ears
- Name each style clearly so buyers understand the look
- Add a tiny care card, so buyers trust you more
Where to sell: Etsy and other online marketplaces where photos do the selling, or craft fairs where people can touch and try them on.
How to create (step by step):
- Roll the clay on parchment paper until it’s smooth and even.
- Cut your shapes with cutters or a clean craft knife.
- Make holes for jump rings if you’re making dangles.
- Let pieces dry flat, then flip once so they dry evenly.
- Sand edges gently until they feel smooth to the touch.
- Paint or add details, then let everything dry fully.
- Seal both sides, then let the sealer cure completely.
- Add jump rings and hooks, then do a gentle tug test.
Pendant necklaces
Why it sells: Pendant necklaces sell because they feel personal and work well as everyday jewelry.
Materials and tools: Air dry clay, acrylic roller or rolling pin, parchment paper, craft knife, needle tool or toothpick, sanding sponge or fine sandpaper, necklace chains or cords, jump rings, strong craft glue, acrylic paint or paint pens, and a clear matte or glossy sealer.
Pricing: $14-$32 per necklace, or $30-$60 for a 2-piece set.
Mistakes to avoid:
- Making pendants too heavy
- Placing holes too close to the edge
- Sealing only one side
How to sell more:
- Offer short and long chain options
- Sell matching earring add-ons
- Offer initial or symbol variations
Where to sell: Etsy and online shops, plus craft fairs.
How to create (step by step):
- Roll the clay evenly on parchment paper.
- Cut pendant shapes with a clean craft knife.
- Make holes or attachment points carefully.
- Let pieces dry flat, flipping once.
- Sand edges gently until smooth.
- Paint or decorate and let dry fully.
- Seal both sides and let cure.
- Attach chains or cords and test strength.
Bead style bracelets
Why it sells: Bead bracelets sell because they’re simple, stackable, and easy to size.
Materials and tools: Air dry clay, acrylic roller or rolling pin, parchment paper, needle tool or toothpick, sanding sponge or fine sandpaper, elastic cord or jewelry wire, acrylic paint or paint pens, and a clear matte or glossy sealer.
Pricing: $10-$24 per bracelet, or $22-$48 for a stack.
Mistakes to avoid:
- Making bead holes too small
- Not letting beads dry fully before stringing
- Skipping sealer on beads
How to sell more:
- Sell color-coordinated stacks
- Offer size options
- Bundle bracelets with matching earrings
Where to sell: Etsy, online shops, and craft fairs.
How to create (step by step):
- Roll small clay balls evenly.
- Make holes through each bead with a toothpick.
- Let beads dry fully before sanding.
- Sand lightly to smooth surfaces.
- Paint or decorate and let dry.
- Seal beads and let cure completely.
- String beads and secure knots or clasps.
Charm sets that match
Why it sells: Matching charm sets sell because buyers like coordinated pieces that go together.
Materials and tools: Air dry clay, acrylic roller or rolling pin, parchment paper, clay cutters or craft knife, needle tool or toothpick, sanding sponge or fine sandpaper, jump rings, strong craft glue, acrylic paint or paint pens, and a clear matte or glossy sealer.
Pricing: $12-$28 per set, or $28-$55 for larger bundles.
Mistakes to avoid:
- Mixing too many styles in one set
- Making charms uneven sizes
- Adding hardware before sealing
How to sell more:
- Sell themed sets like hearts or symbols
- Offer mix and match options
- Bundle charms with keychains or necklaces
Where to sell: Etsy, online shops, and craft fairs.
How to create (step by step):
- Roll the clay evenly on parchment paper.
- Cut matching charm shapes.
- Add holes for jump rings.
- Let pieces dry flat, flipping once.
- Sand edges gently until smooth.
- Paint or decorate and let dry.
- Seal both sides and let cure.
- Attach hardware and test gently.
Air dry clay projects perfect as gifts
Personalized initial pieces
Why it sells: Initial pieces sell because they feel personal and thoughtful, and people don’t need to guess what someone will like.
Materials and tools: Air dry clay, acrylic roller or rolling pin, parchment paper, letter cutters or a craft knife, sanding sponge or fine sandpaper, acrylic paint or paint pens, and a clear matte or glossy sealer.
Pricing: $8-$20 per piece, or $18-$40 for a small set.
Mistakes to avoid:
- Making letters too thin, because they crack
- Messy paint lines, because it looks sloppy
- Skipping sanding on edges
How to sell more:
- Offer initials and short names
- Sell matching family sets
- Add gift box packaging
Where to sell: Etsy, online shops, and craft fairs.
How to create (step by step):
- Roll the clay on parchment paper until it’s smooth and even.
- Cut letter shapes cleanly.
- Smooth edges gently.
- Let pieces dry flat, flipping once.
- Sand edges until smooth.
- Paint or decorate and let dry fully.
- Seal both sides and let the sealer cure completely.
Thank you gifts in small sets
Why it sells: Thank you gifts sell because people need quick, affordable gifts that still feel meaningful.
Materials and tools: Air dry clay, acrylic roller or rolling pin, parchment paper, craft knife, sanding sponge or fine sandpaper, acrylic paint, and a clear matte or glossy sealer.
Pricing: $10-$24 per set, or $22-$45 for two sets.
Mistakes to avoid:
- Mixing pieces that don’t match
- Overdecorating small items
- Forgetting simple packaging
How to sell more:
- Create ready made thank you bundles
- Offer neutral color options
- Add note cards as an add on
Where to sell: Etsy, online shops, and craft fairs.
How to create (step by step):
- Choose one shape and color theme.
- Roll and cut pieces evenly.
- Let everything dry fully.
- Sand edges until smooth.
- Paint and let dry.
- Seal all pieces together and let cure.
Bridesmaid and birthday bundles
Why it sells: Bundles sell because people want coordinated gifts without extra work.
Materials and tools: Air dry clay, acrylic roller or rolling pin, parchment paper, bowl molds, sanding sponge or fine sandpaper, acrylic paint, and a clear matte or glossy sealer.
Pricing: $25-$60 per bundle, depending on size.
Mistakes to avoid:
- Mixing too many styles in one bundle
- Rushing dry time
- Underpricing custom work
How to sell more:
- Offer color themed bundles
- Sell limited bundle sizes
- Add name or date personalization
Where to sell: Etsy, custom order shops, and craft fairs.
How to create (step by step):
- Pick a color palette first.
- Make all pieces using the same thickness.
- Let everything dry fully.
- Sand all pieces together.
- Paint and let dry.
- Seal and let the sealer cure completely.
Desk gifts people use daily
Why it sells: Desk gifts sell because they’re useful and visible every day.
Materials and tools: Air dry clay, acrylic roller or rolling pin, parchment paper, craft knife, sanding sponge or fine sandpaper, acrylic paint, and a clear matte or glossy sealer.
Pricing: $8-$22 per item, or $18-$45 for a set.
Mistakes to avoid:
- Making items too light, because they move
- Skipping sanding
- Using loud colors that don’t match desks
How to sell more:
- Bundle items into desk sets
- Offer neutral office colors
- Add gift ready packaging
Where to sell: Etsy, gift shops, and craft fairs.
How to create (step by step):
- Roll the clay evenly on parchment paper.
- Cut simple desk friendly shapes.
- Let pieces dry fully.
- Sand edges until smooth.
- Paint lightly and let dry.
- Seal and let the sealer cure completely.
Gift ready packaging ideas
Why it sells: Packaging add ons sell because buyers want gifts that feel finished.
Materials and tools: Small boxes, tissue paper, stickers, twine, and printed care cards.
Pricing: $3-$8 per order as an add on.
Mistakes to avoid:
- Overpacking small items
- Using weak boxes
- Forgetting care instructions
How to sell more:
- Offer gift wrap as a checkout option
- Create seasonal packaging
- Add handwritten thank you notes
Where to sell: Online shops and craft fairs.
How to create (step by step):
- Choose packaging that fits the item snugly.
- Add tissue and padding.
- Include a care card.
- Close and label the box neatly.
Air dry clay projects for Christmas
Ornament sets
Why it sells: Ornament sets sell because people like buying a full tree theme instead of single pieces.
Materials and tools: Air dry clay, acrylic roller or rolling pin, parchment paper, clay cutters or a craft knife, straw or toothpick, sanding sponge or fine sandpaper, acrylic paint or paint pens, ribbon or string, and a clear matte or glossy sealer.
Pricing: $14-$38 per set, or $35-$75 for two sets.
Mistakes to avoid:
- Making holes too close to the edge
- Packing ornaments before they fully cure
- Skipping sealer, so paint rubs off
How to sell more:
- Sell themed sets like stars, trees, or gingerbread
- Offer name personalization as an add on
- Bundle ornaments in gift boxes
Where to sell: Holiday markets, Etsy, and online shops.
How to create (step by step):
- Roll the clay on parchment paper until it’s smooth and even.
- Cut ornament shapes with cutters or a clean craft knife.
- Make hanging holes using a straw or toothpick.
- Let pieces dry flat, then flip once so they dry evenly.
- Sand edges gently until smooth.
- Paint or decorate and let everything dry fully.
- Seal both sides and let the sealer cure completely.
- Add ribbon and pack carefully.
Gift tag packs
Why it sells: Gift tag packs sell because people need many tags at once during the holidays.
Materials and tools: Air dry clay, acrylic roller or rolling pin, parchment paper, craft knife, straw or toothpick, sanding sponge or fine sandpaper, paint pens, string or twine, and a clear matte or glossy sealer.
Pricing: $10-$24 per pack, or $22-$48 for two packs.
Mistakes to avoid:
- Writing names too small
- Making holes too close to the edge
- Sealing too thick, because it gets sticky
How to sell more:
- Sell blank and personalized versions
- Offer matching ornament add ons
- Bundle packs for families
Where to sell: Holiday markets and online shops.
How to create (step by step):
- Roll the clay evenly on parchment paper.
- Cut tag shapes with a craft knife.
- Make holes using a straw.
- Let pieces dry flat, flipping once.
- Sand edges gently until smooth.
- Write names or designs with pens.
- Seal both sides and let the sealer cure completely.
- String tags and pack in sets.
Stocking stuffer minis
Why it sells: Stocking stuffers sell because people like small, affordable gifts they can buy in multiples.
Materials and tools: Air dry clay, acrylic roller or rolling pin, parchment paper, clay cutters or craft knife, sanding sponge or fine sandpaper, acrylic paint or paint pens, and a clear matte or glossy sealer.
Pricing: $5-$14 per item, or $14-$30 for small sets.
Mistakes to avoid:
- Making items too fragile
- Overdecorating tiny pieces
- Packing before fully cured
How to sell more:
- Sell mini sets instead of singles
- Offer holiday color themes
- Bundle with gift wrap
Where to sell: Craft fairs, holiday markets, and online shops.
How to create (step by step):
- Roll the clay evenly on parchment paper.
- Cut small shapes with cutters or a craft knife.
- Let pieces dry flat, flipping once.
- Sand edges gently until smooth.
- Paint details and let dry fully.
- Seal both sides and let the sealer cure completely.
Place card holders
Why it sells: Place card holders sell because people buy them for holiday dinners and events.
Materials and tools: Air dry clay, acrylic roller or rolling pin, parchment paper, craft knife, wire or slot tool, sanding sponge or fine sandpaper, acrylic paint, and a clear matte or glossy sealer.
Pricing: $6-$18 each, or $18-$45 for a set.
Mistakes to avoid:
- Making the base too light, because it tips
- Cutting slots too wide
- Skipping sealer
How to sell more:
- Sell sets sized for tables
- Offer neutral holiday colors
- Bundle with matching tags
Where to sell: Holiday markets, Etsy, and event shops.
How to create (step by step):
- Shape a thick base from clay.
- Add a slot or insert wire while soft.
- Let the piece dry fully.
- Sand edges until smooth.
- Paint and let dry.
- Seal both sides and let the sealer cure completely.
Small holiday decor bundles
Why it sells: Decor bundles sell because people like coordinated pieces without extra shopping.
Materials and tools: Air dry clay, acrylic roller or rolling pin, parchment paper, craft knife, sanding sponge or fine sandpaper, acrylic paint, and a clear matte or glossy sealer.
Pricing: $20-$55 per bundle, depending on size.
Mistakes to avoid:
- Mixing too many styles
- Using clashing colors
- Rushing dry time
How to sell more:
- Create color themed holiday bundles
- Sell limited edition sets
- Offer early holiday bundles
Where to sell: Holiday markets, Etsy, and online shops.
How to create (step by step):
- Choose one holiday color palette.
- Make all pieces using the same thickness.
- Let everything dry fully.
- Sand all pieces together.
- Paint and let it dry.
- Seal all items and let the sealer cure completely.
Photos and listings that get clicks
If your photos don’t look clean, nothing else matters. People decide in a few seconds if they trust your product, and photos do most of that work.
Photo checklist for clean shots:
- Use natural light near a window, never overhead lights
- Shoot on a plain surface so the item stands out
- Take at least one straight-on photo and one close-up
- Show the back and sides so buyers don’t feel surprised
- Keep colors realistic and don’t over-edit
Listing points buyers care about:
People skim listings, so give them what they’re actually looking for.
- What the item is and what it’s used for
- Approximate size so they know what to expect
- What’s included if it’s a set
- Color options or variations
- How it’s packaged if it’s a gift
Avoid long stories and fluff. Clear beats clever every time.
Care instructions to prevent complaints:
Most complaints come from buyers using items wrong, not from bad products.
- Tell them to keep items away from water unless stated otherwise
- Say it’s decorative and handmade
- Explain how to clean it safely
- Add care instructions in the listing and inside the package
Packaging and shipping basics
You don’t need fancy packaging. You just need pieces to arrive in one piece.
How to protect pieces in transit:
- Wrap each item on its own so they don’t hit each other
- Use padding that doesn’t shift inside the box
- Choose a box that fits snug, not oversized
- Shake the box gently before sealing to check movement
What to include in a care card:
- A short note saying it’s handmade
- Basic care instructions in plain language
- A quick “thank you” line
- Your shop name or handle
How to avoid breakage and returns:
- Don’t ship before items are fully cured
- Avoid thin or fragile designs for shipping orders
- Be clear in listings that items are decorative
- Package the way you’d want to receive it
Wrap up
Pick one idea from this list and make a small batch instead of trying everything at once. You’ll learn way more by finishing and listing one product than by planning forever.
That’s how most people actually figure out which air dry clay projects are worth their time. List it, see what people click and buy, then adjust and repeat what works. Keep it simple, stay consistent, and let the results guide your next move.