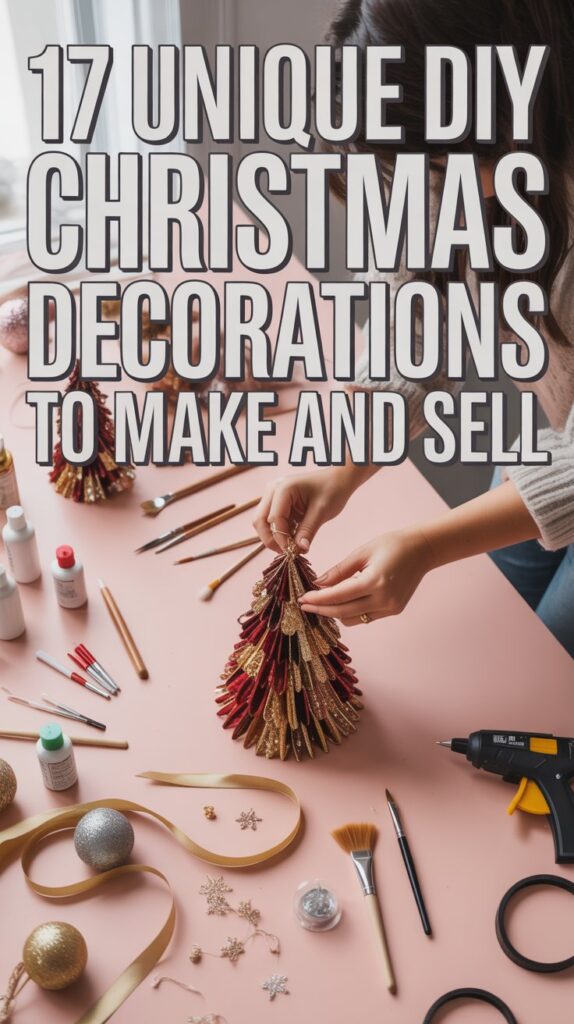
The holiday season is here, and people want special DIY Christmas decorations. You can make items that make homes look great and hold special meaning.
Making and selling handmade holiday items is fun and can make money. It lets you show your creativity. It also meets the need for unique Christmas crafts.
Now let’s look at what you can create and sell.
This post includes affiliate links to products I love and recommend, meaning I may receive a small commission at no extra cost to you. Please read full disclosure for more information.
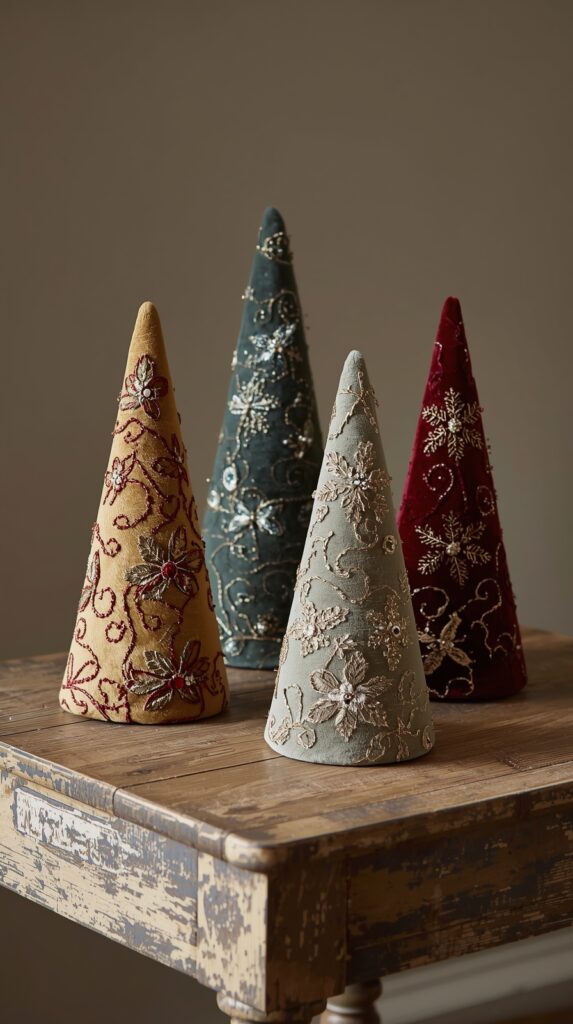
1.) Luxury Velvet Cone Trees
Why it sells: Elegant, boutique look. Velvet is trending. Easy to make and perfect for sets that feel high-end.
Popular items: Emerald velvet cones, champagne velvet trees, burgundy sets, blush pink cones, velvet trees with pearl trim.
Specific materials: Foam or cardboard cones, stretch velvet, fabric glue or hot glue, scissors, pearl or gold trim, optional wooden bases.
Pricing: $15–$25 per cone or $40–$70 per 3-piece set.
Mistakes to avoid:
- Non-stretch velvet that wrinkles
- Visible glue lines
- Velvet cut too short
- Loose wrapping that causes bumps
How to sell more:
- Sell in sets of three
- Use premium colors like emerald or champagne
- Add pearl or gold trim for luxury feel
- Style photos with candles or gold décor
Where to sell: Etsy, Instagram, TikTok Shop, craft fairs, Christmas markets.
How to create (step by step)
- Prep cones: Use foam cones or roll sturdy cardboard into a cone shape. Tape the seam tightly so it holds its form.
- Measure + cut velvet: Wrap velvet around the cone to find the right size. Cut a piece slightly taller and wider than needed so the overlap is clean.
- Glue the base: Apply a thin vertical line of fabric glue or small dots of hot glue. Thin glue prevents bumps under the velvet.
- Wrap the velvet: Pull the fabric tight as you wrap. Smooth wrinkles with your hand. Trim any excess around the top and bottom.
- Finish the top: Fold velvet neatly at the tip and glue it down. Add a small star, bead, or gold accent if you want a finished look.
- Add trim: Glue pearl trim, gold rope, or rhinestone ribbon around the base or in a spiral for a luxury vibe.
- Attach base (optional): Glue the cone onto a wood slice or stand to add height and stability.
- Batch smart: Cut all velvet pieces first. Wrap all cones next. Decorate everything last. This keeps sets consistent and speeds up production.
You’ll also enjoy my other blog post with The Hottest Christmas Decorations to Make and Sell For Profit.
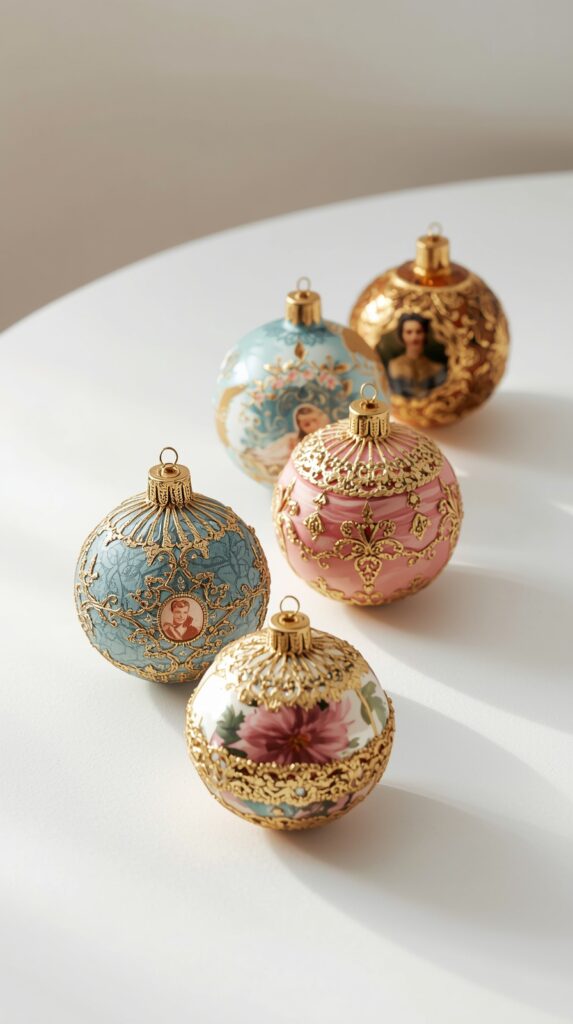
2.) Vintage Ornaments
Why it sells: Vintage decor is trending. These ornaments look elegant, nostalgic, and high-value. They fit farmhouse and old-world Christmas themes, and they’re easy to batch.
Popular items: Mercury-glass ornaments, crackle ornaments, aged gold baubles, Victorian decoupage ornaments, sheet-music ornaments.
Specific materials: Clear baubles, metallic paints, crackle medium, Mod Podge, vintage prints, sheet music, glitter, ribbons, clear sealer.
Pricing: $6–$12 per ornament or $20–$35 per 4–6 piece set.
Mistakes to avoid:
- Thick paint that hides texture
- Wrinkled decoupage from too much glue
- Skipping sealer
- Using bright modern colors
How to sell more:
- Offer sets in matching styles
- Use antique tones like gold, pearl, bronze
- Add ribbons or charms
- Package in kraft boxes
Where to sell: Etsy, Facebook Marketplace, Christmas markets, and vintage décor boutiques.
How to create (step by step)
- Prep baubles: Remove tops from plastic or glass baubles. Wipe clean so paint or glue sticks well.
- Choose finish: Decide between crackle, mercury-glass, aged metallic, or decoupage. Keep colors muted for a vintage feel.
- Base coat: Apply a thin coat of metallic or pearl paint inside or outside the bauble. Let dry fully.
- Add aging: Brush crackle medium, antique glaze, or diluted brown paint around edges. Wipe excess for a soft aged look.
- Decoupage (optional): Apply Mod Podge to the bauble, place vintage print pieces, and smooth gently. Let dry 10–15 minutes.
- Add details: Glue on ribbon bows, charms, or tiny bells. Lightly dust with fine glitter if you want a shimmering vintage touch.
- Seal: Spray or brush a matte or satin sealer over the ornament to protect paint, glaze, or paper.
- Batch smart: Paint all bases at once, age all ornaments next, then add details and seal last. Keep sets consistent.
3.) Nordic Lanterns
Why it sells: Warm, minimalist Scandinavian style is trending. These lanterns look cozy and high-end, especially with soft LED lights and snowy details. They make beautiful mantle, entryway, and table décor.
Popular items: Frosted lanterns with winter trees, neutral lanterns with tiny houses, lanterns filled with faux snow, LED woodland scenes, minimalist black-and-white Nordic designs.
Specific materials: Wooden or metal lanterns, LED candles or fairy lights, faux snow, small trees or houses, matte white paint, Mod Podge, clear sealer, and optional stencil snowflakes.
Pricing: $20–$45 per lantern or $50–$80 per 2-piece set.
Mistakes to avoid:
- Using real candles
- Overfilling the lantern
- Bright or bold colors (kills the Nordic look)
- Loose snow that spills everywhere
How to sell more:
- Offer sets in different sizes
- Use neutral tones like white, black, and natural wood
- Add tiny trees or houses for a “Nordic village” feel
- Photograph in dim lighting with the lantern glowing
Where to sell: Etsy, Christmas markets, home décor boutiques, Facebook Marketplace.
How to create (step by step)
- Prep lantern: Clean glass panels and wipe the frame. Remove dust so paint and glue stick well.
- Frost glass: Brush Mod Podge on the inside of the glass and dab with a sponge for a frosted look.
- Add winter scene: Place LED candles, small trees, or mini houses inside. Keep spacing clean and minimal.
- Add snow: Pour a small amount of faux snow around the base. Press lightly so it stays in place.
- Paint accents: Dry brush white paint on edges of the lantern for a snowy finish.
- Add lights: Wrap fairy lights loosely around the center or place them behind trees for a soft glow.
- Seal: Spray or brush a clear matte sealer around painted areas to protect the finish.
- Batch smart: Frost all lanterns first, add scenes next, then decorate and style each one for consistency.
You might also want to check out these 19 Profitable Christmas Decor Ideas You Can Make And Sell.

4.) Snowy Mason Jars
Why it sells: Cozy, soft-glow Christmas décor that feels handmade and warm. These jars look expensive on mantels and tables, and buyers love them because they work for any style, from farmhouse to Scandinavian.
Popular items: Frosted jars with LED lights, jars wrapped in lace and twine, jars with snowy trees inside, glitter snow jars, neutral winter scenes.
Specific materials: Mason jars, Mod Podge, faux snow or Epsom salt, white acrylic paint, sponge brush, ribbon or twine, mini trees, LED tealights, clear sealer.
Pricing: $10–$20 per jar or $25–$40 per 3-piece set.
Mistakes to avoid:
- Too much glue creating streaks
- Overfilling with snow
- Using real candles
- Unwashed jars that resist paint
How to sell more:
- Sell in sets of two or three
- Offer different sizes for layered displays
- Add matching bows or greenery for a finished look
- Photograph glowing versions in dim lighting
Where to sell: Etsy, Christmas markets, local boutiques, Facebook Marketplace.
How to create (step by step)
- Prep jars: Wash and dry jars completely so paint and glue adhere well.
- Frost the glass: Brush Mod Podge over the outside and tap with a sponge to create a frosted texture.
- Add snow: While the Mod Podge is still tacky, sprinkle faux snow or Epsom salt over the jar. Let dry.
- Paint accents: Dry brush white paint around the base or rim for a snowy finish.
- Add decor: Tie twine or ribbon around the top. Add a small sprig of greenery or a charm if desired.
- Insert lights: Place an LED tealight or mini fairy lights inside for a warm glow.
- Seal: Spray or brush a light coat of clear sealer to keep snow from shedding.
- Batch smart: Frost all jars first, then snow them all, then decorate and add lights for fast, consistent batches.
5.) Wooden Christmas Village Houses
Why it sells: These tiny houses fit the Scandinavian and minimalist Christmas trend. Buyers love them for shelves, mantels, and tray displays. They look high-end but are simple to make in batches.
Popular items: Neutral wooden houses, snowy-roof houses, black-and-white Nordic houses, mini village sets, LED-backlit houses.
Specific materials: Wood blocks or cut houses, white or black acrylic paint, fine brushes, sandpaper, faux snow, wood stain, optional LED tea lights.
Pricing: $20–$50 per village set depending on size and number of houses.
Mistakes to avoid:
- Painting heavy coats
- Crooked windows
- Using too many colors
- Not sanding edges for a clean look
How to sell more:
- Offer sets in different sizes
- Keep colors neutral for the Nordic look
- Add faux snow or soft distressing
- Photograph in a full “village scene”
Where to sell: Etsy, craft fairs, Facebook Marketplace, rustic and minimalist décor shops.
How to create (step by step)
- Prep houses: Sand wood blocks or pre-cut house shapes. Wipe dust for smooth painting.
- Base finish: Leave natural, stain lightly, or paint with a neutral color. Let dry.
- Add windows: Use a fine brush to paint simple windows and doors. Keep lines clean.
- Snowy details: Add faux snow to roofs using Mod Podge and sprinkle-on snow.
- Paint accents: Dry brush white paint on edges for a winter look.
- Add lights (optional): Place LED tealights behind larger houses for soft glow.
- Seal: Use a clear matte sealer to protect the finish.
- Batch smart: Sand all pieces first, paint bases next, then add windows and snow to keep the sets consistent.
6.) Luxury Christmas Tree Bows
Why it sells: These bows are trending everywhere. Velvet, satin, and layered ribbon bows make trees look elegant and expensive. Buyers love them because they instantly upgrade any Christmas tree without effort.
Popular items: Velvet bows, satin layered bows, extra-large statement bows, gold-trim bows, neutral Scandinavian bows.
Specific materials: Velvet or satin ribbon, wired ribbon, fabric scissors, floral wire, hot glue, optional gold trim or pearl accents.
Pricing: $8–$15 per bow or $25–$45 per 3–5 piece set.
Mistakes to avoid:
- Cutting ribbon crooked
- Using non-wired ribbon that won’t hold shape
- Bows made too small
- Glue showing at the center
How to sell more:
- Offer bundles in matching colors
- Use trending tones like burgundy, emerald, champagne, and ivory
- Add pearl or gold middles for a luxury feel
- Photograph on trees with warm lights
Where to sell: Etsy, Facebook Marketplace, Instagram, Christmas markets.
How to create (step by step)
- Cut ribbon: Cut two long strips of wired ribbon. Longer strips create fuller bows.
- Form loops: Fold each strip into a loop and pinch the center tightly.
- Secure center: Wrap floral wire around the middle and twist until secure.
- Add tails: Cut a separate piece of ribbon for tails. Fold in half and secure behind the bow with wire or glue.
- Shape bow: Fluff loops and shape the ribbon so it looks full and even.
- Add detail: Glue a pearl, button, knot, or small trim over the center to hide the wire.
- Trim edges: Cut the tails into a clean V-shape for a polished look.
- Batch smart: Cut all ribbon first, make all loops next, wire all centers, then shape and decorate each bow for consistent results.
You’ll love this article: 17 Profitable Christmas Crafts Anyone Can Make and Sell.
7.) Long Christmas Garland
Why it sells: Long garlands make homes feel instantly festive. Buyers love them for stair rails, mantels, door frames, and table runners. Handmade versions look fuller and more premium than store garlands.
Popular items: Pine garlands with ribbon, bead-and-greenery garlands, mixed greenery garlands, snowy garlands, neutral farmhouse garlands.
Specific materials: Faux greenery garland, wired ribbon, wood beads, twine, pinecones, hot glue, floral wire, faux snow spray.
Pricing: $25–$60 depending on length and fullness.
Mistakes to avoid:
- Sparse greenery
- Weak wire that won’t hold shape
- Overloading with heavy decorations
- Ribbon that isn’t wired
How to sell more:
- Offer different lengths
- Add matching bows for upsells
- Use popular themes like farmhouse, Nordic, or traditional red-and-gold
- Photograph it styled on a railing or mantel
Where to sell: Etsy, craft fairs, Facebook Marketplace, local home décor shops.
How to create (step by step)
- Prep base: Fluff faux greenery to make it full. Straighten the wire inside so it holds shape.
- Add ribbon: Weave wired ribbon through the garland. Secure with floral wire every 20–30 cm.
- Add beads: String wooden beads on twine and attach the strand along the garland.
- Add accents: Glue pinecones, small ornaments, or greenery clusters throughout the length.
- Snowy finish: Lightly spray faux snow on the edges for a winter look.
- Secure ends: Add loops of twine or wire at both ends so buyers can hang it easily.
- Seal (optional): Spray a clear sealer on snowy or painted areas to prevent shedding.
- Batch smart: Prep multiple garlands, attach ribbon to all, then add accents and finishing touches for consistency.
8.) Snowy Christmas Terrariums
Why it sells: These terrariums look magical and high-end. Buyers love them for mantels, shelves, and table centerpieces. The soft lights, faux snow, and mini trees create that cozy winter scene everyone wants.
Popular items: Glass jars with mini trees, cloche domes, terrariums with deer, snowy forest scenes, LED-lit winter displays.
Specific materials: Glass jars or cloche domes, faux snow, mini trees or deer, hot glue, LED fairy lights, moss, small wood slices, optional tiny houses.
Pricing: $20–$45 depending on size and detail.
Mistakes to avoid:
- Overfilling with snow
- Using jars that are too small
- Loose figurines that fall over
- Visible glue strings
How to sell more:
- Offer different sizes for layered displays
- Add LED lights for a premium version
- Use neutral colors for a Nordic look
- Photograph in dim lighting to show the glow
Where to sell: Etsy, Christmas markets, home décor shops, Facebook Marketplace.
How to create (step by step)
- Prep base: Choose a large jar or cloche. Clean glass for a clear display.
- Add snow: Pour a thin layer of faux snow or Epsom salt at the bottom.
- Position trees: Glue mini trees or moss onto small wood slices so they stand upright.
- Build the scene: Add deer, tiny houses, or extra greenery around the base.
- Add lights: Place LED fairy lights behind or around the scene for a soft glow.
- Seal the look: Dust a little faux snow inside the rim and close the jar or dome.
- Decorate outside: Tie ribbon or twine around the top. Add a small charm if desired.
- Batch smart: Build all bases first, prepare all trees next, then assemble terrariums in one go for speed and consistency.

9.) Crochet Christmas Tree Decorations
Why it sells: Cute, cozy, and handmade. These mini crochet pieces feel nostalgic and warm. Buyers love them for tree ornaments, gift toppers, and garlands. They look premium because crochet always feels artisanal.
Popular items: Crochet stars, mini trees, snowflakes, bells, angels, small wreaths.
Specific materials: Cotton or acrylic yarn, crochet hook, stuffing (optional), ribbon, jute, small beads or buttons, clear sealer spray for shaping.
Pricing: $6–$12 per ornament or $20–$35 per 4–6 piece set
Mistakes to avoid:
- Loose stitches that lose shape
- Yarn colors that don’t match Christmas themes
- No blocking or shaping
- Overdecorating
How to sell more:
- Offer sets by theme (stars, trees, angels)
- Use trending neutrals like cream, beige, sage, and blush
- Add beads or buttons for extra charm
- Package in kraft boxes with simple branding
Where to sell: Etsy, Instagram, Christmas markets, gift boutiques.
How to create (step by step)
- Choose pattern: Pick a simple Christmas shape like a star, tree, or snowflake.
- Start base: Crochet the main shape using basic stitches (single crochet, double crochet).
- Add second side (optional): Make two identical pieces and crochet or stitch them together.
- Stuff lightly: Add a tiny bit of stuffing for dimension if you want a puffed look.
- Add hanger: Attach jute or ribbon to the top for hanging.
- Decorate: Sew on small beads, buttons, or tiny bows for detail.
- Shape: Use spray sealer or fabric stiffener to help the ornament hold its shape.
- Batch smart: Crochet all bases first, then assemble, stuff, and decorate in one session for consistent sets.
Check out these 17 Easy Crafts to Sell That Make a Profit Fast.
10.) Handmade Christmas Porch Sign
Why it sells: Porch signs are a classic bestseller. They make homes feel festive from the outside in, and buyers love big, bold Christmas statements. Handmade versions look premium and stand out more than store-bought prints.
Popular items: Vertical “Merry Christmas” signs, farmhouse-style signs, red-and-white signs, Nordic black-and-white signs, signs with snowflakes or trees.
Specific materials: Wood board (1×6 or 1×8), sandpaper, acrylic paint, stencils or vinyl letters, clear sealer, painters tape, optional ribbon or greenery.
Pricing: $25–$60 depending on size and detail.
Mistakes to avoid:
- Uneven letters
- Using thin paint that streaks
- No sanding before painting
- Forgetting to seal outdoor signs
How to sell more:
- Offer custom text or family names
- Create color theme options (farmhouse, red/gold, Nordic)
- Add bows or greenery to the top
- Photograph displayed on a real porch
Where to sell: Etsy (local pickup), Facebook Marketplace, craft fairs, home décor shops.
How to create (step by step)
- Prep board: Sand the wood board until smooth. Wipe dust for a clean paint surface.
- Base coat: Paint the board with your main color (white, red, black). Let dry.
- Tape layout: Use painter’s tape to mark where letters or designs will go.
- Stencil letters: Place stencils and dab paint lightly for clean edges.
- Add icons: Paint small snowflakes, trees, or stars around the text.
- Distress (optional): Lightly sand edges for a rustic farmhouse look.
- Seal: Apply a clear outdoor sealer to protect from the weather.
- Batch smart: Paint all boards first, stencil all next, then distress and seal to keep designs consistent.
11.) Custom Pet Ornament
Why it sells: Pet owners buy Christmas ornaments every year. Personalized pet ornaments feel emotional and meaningful, which makes them top sellers. People love honoring their pets with cute designs.
Popular items: Paw print ornaments, pet name ornaments, pet silhouette ornaments, clay paw impressions, wood slice pet portraits.
Specific materials: Wood slices or blank baubles, paint pens, acrylic paint, fine brushes, ribbon, jute, vinyl letters (optional), clear sealer.
Pricing: $10–$25 per ornament depending on personalization.
Mistakes to avoid:
- Sloppy lettering
- Overly detailed designs that take too long
- Not sealing painted surfaces
- Using colors that don’t photograph well
How to sell more:
- Offer name + year personalization
- Provide breed silhouettes as options
- Use a “Pet’s First Christmas” theme
- Package in gift boxes for easy gifting
Where to sell: Etsy, Facebook Marketplace, Instagram, Christmas markets, pet boutiques.
How to create (step by step)
- Prep base: Sand the wood slice or clean the bauble. Wipe dust so paint applies smoothly.
- Paint background: Add a neutral base coat (white, beige, or black). Let dry.
- Add pet design: Paint or draw a paw, silhouette, or simple pet portrait using paint pens or fine brushes.
- Add name + year: Use paint pens or vinyl letters for clean lettering.
- Add ribbon: Tie ribbon or jute at the top to create a hanging loop.
- Seal: Apply a matte or satin sealer to protect the design.
- Decorate: Add tiny bows or charms for extra detail.
- Batch smart: Paint all bases first, draw all designs next, then letter and seal everything in one session.
12.) Mini Cabinet Wreaths With Ribbon
Why it sells: These tiny wreaths look elegant and instantly make kitchens feel festive. Buyers love them because they’re simple, classy, and look expensive when styled in sets across cabinet doors.
Popular items: Green mini wreaths with velvet bows, eucalyptus wreaths, snowy wreaths, farmhouse wreaths with gingham ribbon.
Specific materials: Mini faux wreaths or greenery rings, velvet or satin ribbon, jute, scissors, hot glue, removable hooks or small adhesive tabs.
Pricing: $10–$20 per wreath or $25–$45 per 2–4 piece set.
Mistakes to avoid:
- Thin ribbon that looks cheap
- Sparse greenery
- Oversized bows
- Weak adhesive for hanging
How to sell more:
- Offer multiple ribbon colors
- Sell sets made for full kitchen cabinets
- Use velvet bows for a luxury look
- Photograph styled on real cabinet doors
Where to sell: Etsy, Instagram, Facebook Marketplace, Christmas markets, home décor shops.
How to create (step by step)
- Prep wreaths: Fluff mini wreaths or greenery rings so they look full and even.
- Cut ribbon: Cut long ribbon strips to your desired hanging length.
- Attach ribbon: Loop ribbon through the wreath and tie a clean knot or bow at the top.
- Make bow: Add a separate velvet or satin bow to the front for a polished look.
- Secure ends: Glue ribbon ends so they don’t fray.
- Attach hanging loop: Add a small jute or ribbon loop on the back if needed.
- Add accents (optional): Glue tiny berries, bells, or faux snow.
- Batch smart: Cut all ribbons first, prep all wreaths next, then assemble and bow each set for consistency.
13.) Christmas Candle Ring
Why it sells: Candle rings make simple candles look like full centerpieces. Buyers love them because they add instant holiday charm to tables, trays, and mantels. They look high-end but are fast and cheap to make.
Popular items: Greenery rings, berry rings, snowy rings, eucalyptus rings, mixed greenery farmhouse rings.
Specific materials: Faux greenery stems, small berries, mini pinecones, floral wire, hot glue, wire cutters, faux snow spray, optional ribbon.
Pricing: $10–$20 each or $25–$40 per set of 2–3.
Mistakes to avoid:
- Sparse greenery
- Bulky stems that don’t sit flat
- Mixing too many colors
- No inner support (ring collapses)
How to sell more:
- Offer size options for pillar candles and jars
- Sell matching sets
- Use trending neutral greenery
- Photograph on trays or styled tables
Where to sell: Etsy, craft fairs, local boutiques, Facebook Marketplace.
How to create (step by step)
- Form ring: Bend floral wire into a circle sized to fit around a candle. Twist ends to secure.
- Prep greenery: Cut stems into small pieces so they’re easy to layer.
- Attach greenery: Use hot glue or floral wire to attach greenery around the ring. Keep pieces tight and even.
- Add berries: Glue small berry clusters or mini pinecones between greenery pieces.
- Snowy finish: Lightly spray faux snow on the tips for a winter look.
- Add ribbon (optional): Tie a small bow on one side for extra detail.
- Test fit: Place a candle in the center to make sure the ring sits flat.
- Batch smart: Prep all wire rings first, attach greenery next, then add berries and snow for consistent sets.
You’ll also love this blog post: 35 Crafts That Sell Well And Make You Money.
14.) Boho Macrame Christmas Ornaments
Why it sells: Boho Christmas décor is trending hard. These ornaments feel handmade, warm, and stylish. Buyers love them for minimalist, neutral, and Scandinavian-themed trees.
Popular items: Macrame snowflakes, stars, mini trees, angels, tassels, woven circles.
Specific materials: Cotton macrame cord, wooden rings, wooden beads, scissors, comb, fabric stiffener, optional glitter or ribbon.
Pricing: $8–$15 per ornament or $25–$45 per 3–5 piece set.
Mistakes to avoid:
- Uneven cord lengths
- Loose knots
- Not brushing cords for fluffy texture
- No stiffener (ornaments lose shape)
How to sell more:
- Offer matching sets
- Use neutral tones like cream, beige, sage
- Add wooden beads for extra charm
- Package in kraft boxes with tissue
Where to sell: Etsy, Instagram, Christmas markets, handmade boutiques.
How to create (step by step)
- Prep cords: Cut macrame cord into equal lengths based on the ornament style you’re making.
- Attach cords: Knot cords onto a wooden ring or main cord using lark’s head knots.
- Create shape: Tie simple macrame knots (square knots, half hitch) to form a star, snowflake, or tree.
- Add beads: Slide wooden beads onto cords for a boho look.
- Shape ends: Trim and comb out cord ends to make them fluffy.
- Stiffen: Spray with fabric stiffener so the ornament holds its shape.
- Add hanger: Tie a small loop of cord or ribbon at the top.
- Batch smart: Cut all cords first, tie all bases next, then knot, trim, and stiffen each ornament for even sets.
15.) Rustic Wood Bead Garlands
Why it sells: Farmhouse and neutral Christmas décor is still huge. These garlands look warm, minimal, and high-end. Buyers use them on trees, mantels, trays, and shelves. They’re cheap to make and perfect for batching.
Popular items: Natural bead garlands, stained bead garlands, painted white beads, tassel garlands, bead garlands with stars or mini trees.
Specific materials: Wooden beads (various sizes), jute or cotton string, scissors, tassels, small wooden shapes, optional white paint or stain.
Pricing: $10–$25 per garland depending on length and bead size.
Mistakes to avoid:
- Uneven bead spacing
- Weak knots
- Using short strings
- Mixing too many colors
How to sell more:
- Offer multiple lengths
- Add tassels or wooden charms
- Stick to neutral farmhouse colors
- Photograph draped on trees or trays
Where to sell: Etsy, craft fairs, Facebook Marketplace, rustic décor boutiques.
How to create (step by step)
- Cut string: Measure and cut a long piece of jute or cotton cord. Add extra for knots.
- String beads: Thread wooden beads in a repeating pattern or random mix.
- Add charms: Tie or glue wooden stars, trees, or other small shapes onto the garland.
- Finish ends: Tie secure knots at both ends so beads don’t slide.
- Add tassels: Attach tassels to one or both ends for a farmhouse finish.
- Paint (optional): Lightly paint a few beads white or stain them for contrast.
- Seal (optional): Brush a matte sealer if using paint or stain.
- Batch smart: String multiple garlands in one session using the same bead pattern for consistent sets.
16.) Nordic Gnomes
Why it sells: Nordic gnomes are bestsellers every Christmas. They’re cute, cozy, and match Scandinavian décor. Buyers love them for shelves, trays, and mantels. They look premium but are fast to make.
Popular items: Neutral gnomes, gray-and-white gnomes, tall-hat gnomes, gnome sets, mini ornament gnomes.
Specific materials: Felt or knit fabric, faux fur for beards, wooden beads for noses, fabric scraps, hot glue, scissors, rice or stuffing, optional ribbon or bells.
Pricing: $10–$18 per gnome or $25–$35 per 3–5 piece set.
Mistakes to avoid:
- Uneven beard trimming
- Hats glued on crooked
- Weak stuffing that makes them fall over
- Bright colors that don’t fit the Nordic style
How to sell more:
- Offer sets in neutral colors
- Add bells or mini snowflakes
- Sell as ornaments or stand-alone gnomes
- Photograph on shelves with soft lighting
Where to sell: Etsy, Christmas markets, craft fairs, Scandinavian décor shops.
How to create (step by step)
- Cut hat: Cut felt into a tall triangle for a long Nordic hat.
- Make body: Fill a small fabric pouch with rice or stuffing. Tie the top to close.
- Attach beard: Cut faux fur into a small triangle. Glue it to the front of the body.
- Add nose: Glue a wooden bead at the top edge of the beard.
- Attach hat: Wrap the felt triangle into a cone and glue. Place it over the nose and secure.
- Add details: Glue a bell, snowflake charm, or tiny bow on the hat.
- Shape beard: Trim fur neatly for a clean look.
- Batch smart: Cut all hats first, prep all bodies next, then add beards, noses, and hats assembly-line style.
17.) Chunky Knit Christmas Stockings
Why it sells: Chunky knit décor is in huge demand. These stockings look cozy, luxe, and boutique-quality. Buyers love them for mantels, stair rails, and holiday photos. Even simple designs feel premium because of the thick yarn.
Popular items: Cream knit stockings, gray chunky stockings, cable-knit look stockings, oversized stockings, stockings with faux fur trim.
Specific materials: Super bulky yarn, large knitting needles or a knitting loom, scissors, optional faux fur trim, ribbon or tags, fabric liner (optional).
Pricing: $25–$50 per stocking depending on size and yarn quality.
Mistakes to avoid:
- Uneven stitches
- Too-thin yarn that loses the chunky look
- Weak loops at the hanging point
- Stockings that are too small
How to sell more:
- Offer color options like cream, gray, and blush
- Add name tags or faux fur cuffs
- Sell matching family sets
- Photograph on a styled mantel
Where to sell: Etsy, Instagram, Christmas markets, local home décor boutiques.
How to create (step by step)
- Choose method: Use a large knitting loom or oversized needles for thick stitches.
- Cast on: Start with enough stitches to create the width of your stocking.
- Knit body: Knit in the round (or flat and seam later) using super bulky yarn until you reach the heel.
- Shape heel: Follow a simple heel pattern or make a flat heel section and rejoin the round.
- Knit foot: Continue knitting the foot section to your preferred length.
- Close toe: Bind off or stitch the toe shut neatly.
- Add a hanger: Knit or braid a small loop and attach securely to the top corner.
- Finish: Add faux fur trim, labels, or small bows for detail.
- Batch smart: Knit multiple stockings in the same color first, then add trims and tags last for consistency.
Don’t forget to check out these 37 Profitable Crafts to Make and Sell for Extra Cash.
Conclusion:
When people shop for the holidays, they want décor that feels warm and personal. That’s why these DIY Christmas decorations work so well.
They look thoughtful, they stand out, and they give buyers that cozy Christmas feeling without any effort on their side.
Choose a few ideas you enjoyed, start creating in batches, and get your shop ready. These are the kinds of pieces people love bringing into their homes every year.