Every year, thousands of makers flood Etsy, Pinterest, and craft fairs with Christmas decorations.
But only a few designs actually sell out.
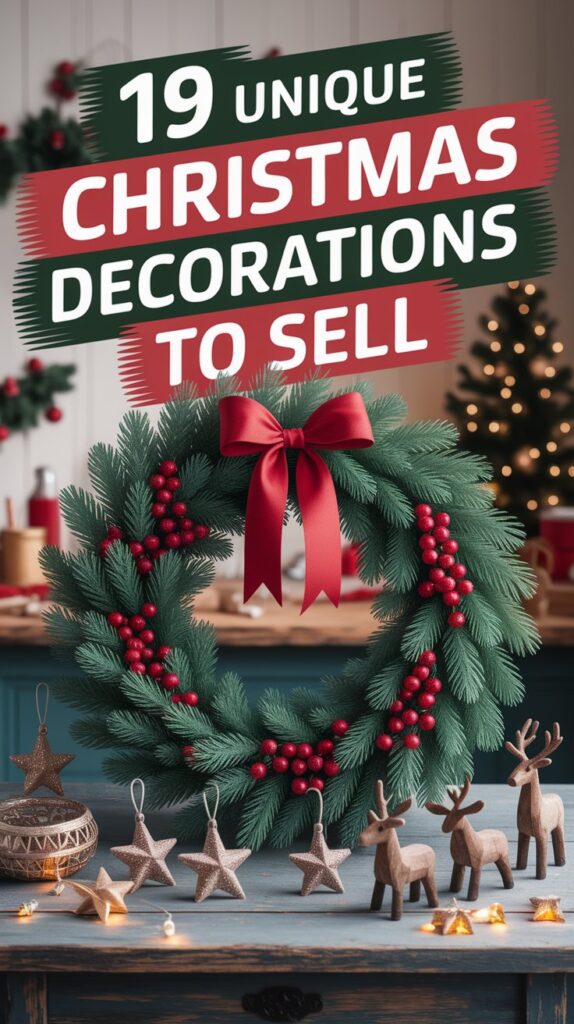
If you’re ready to turn your creativity into extra holiday income, this guide shows you the hottest Christmas decor to make and sell this season – the ones buyers can’t stop adding to their carts.
You don’t need a big budget or a workshop full of tools. Just smart ideas, a bit of sparkle, and a plan to stand out.
Let’s get your holiday crafts selling faster than Santa’s cookies disappear.
This post includes affiliate links to products I love and recommend, meaning I may receive a small commission at no extra cost to you. Please read full disclosure for more information.
19 DIY Christmas Decorations You Can Sell Fast
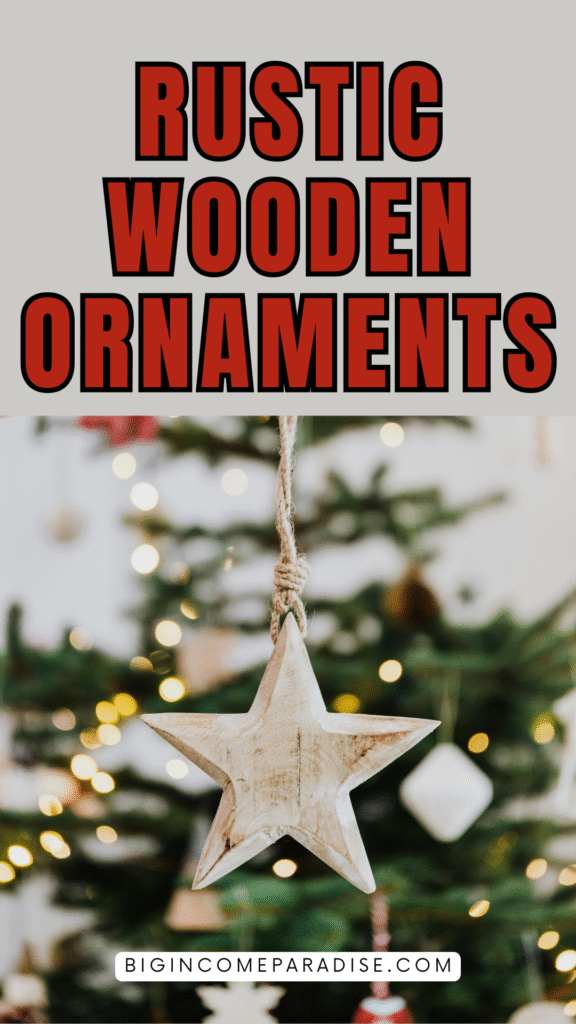
1.) Rustic Wooden Ornaments
Why it sells: Warm, farmhouse look. Cheap to produce. Easy to batch. Fits “Christmas decorations” search intent.
Popular items: Wood-slice ornaments with “Merry,” “Joy,” dates, snowflakes, trees, plaid patterns.
Specific materials: Pre-cut wood slices with hole, jute/twine, acrylic paint or paint pens, small brushes, alphabet/shape stencils, clear matte sealer, optional ribbon, mini bells, plaid scraps.
Pricing: $4–$8 per ornament or $15–$25 per 4-pack, depending on finish and add-ons.
Mistakes to avoid:
- Bleed under stencils from too-wet paint.
- No sealing, which causes smearing or sap stains.
- Heavy slices that pull off tree branches; keep ~6–7 cm diameter.
- Messy twine ends; burn or glue to finish.
How to sell more:
- Offer themed bundles (Rustic Words Set, Snowflakes Set).
- Add light distressing or plaid bow for a premium “finished” look.
- Shoot photos on pine greenery with warm lights for instant vibe.
- Package in kraft boxes with shredded paper; label as “Handmade Christmas Decorations.”
Where to sell: Etsy, Facebook Marketplace, holiday markets, local boutiques, teacher gift sets.
How to create (step by step)
- Prep slices: Lightly sand both sides. Wipe dust. Keep the bark intact.
- Base coat (optional): Brush a thin acrylic base (white, cream, or stain). Let dry 10–15 min.
- Plan design: Tape stencil or sketch a simple layout. Favor short words or icons for speed.
- Paint details: Dab paint through stencil with nearly dry brush, or use paint pens for lettering/snowflakes. Work light to dark.
- Dry + touch up: Let set 10 min. Clean edges with a fine brush if needed.
- Seal: Spray or brush a thin matte clear coat on both sides. Dry fully.
- String: Cut 8-10 cm jute. Thread through the hole, tie the loop. Add a tiny ribbon, bell, or bead if desired.
- Batch smart: Work in trays of 12-24 at a time – base coat all, then stencil all, then seal all for speed.
You’ll also love these 35 Crafts That Sell Well And Make You Money.
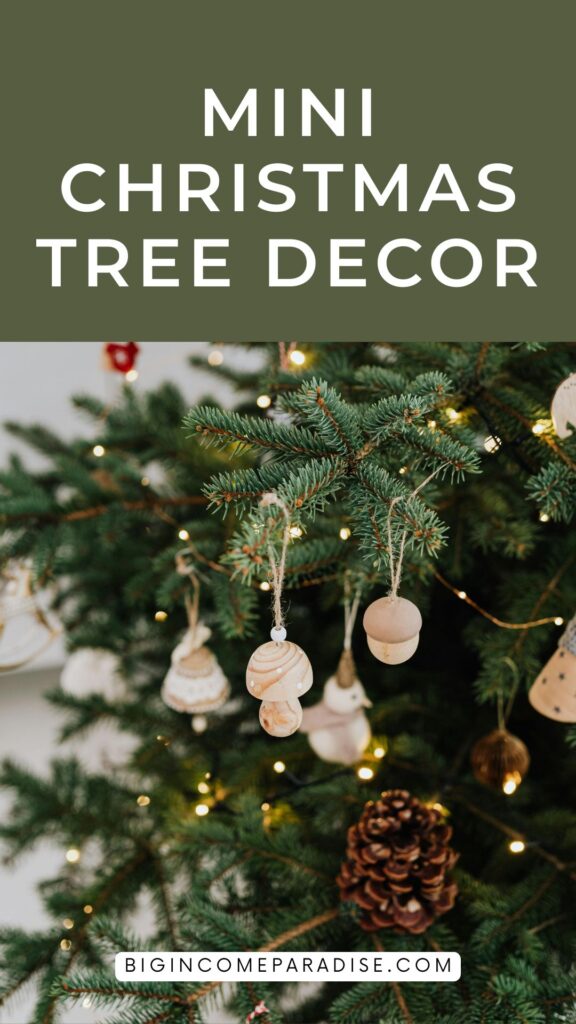
2.) Mini Christmas Tree Decorations
Why it sells:
These are small, adorable, and perfect for people who live in apartments or want extra trees for desks, shelves, or gift tables. They’re easy to make in bulk, and buyers love them as quick holiday accents or teacher gifts.
Popular items:
Mini pinecone trees, felt cone trees, yarn-wrapped trees, or ones made with small wooden bases.
Specific materials:
Pinecones or foam cones, green acrylic paint or yarn, mini wooden bases, glue gun, small pom-poms or stars, and optional glitter or fake snow.
Pricing:
$5–$10 per piece or $20–$30 for a set of 3.
Mistakes to avoid:
- Using weak glue that doesn’t hold decorations.
- Overloading the tree with large ornaments (keep proportions small).
- Skipping the base – makes them tip over easily.
How to sell more:
- Sell in bundles (e.g., 3-piece “Desk Forest Set”).
- Offer color options like white/gold, green/red, or neutral “farmhouse.”
- Use eco-friendly labels (“made from natural pinecones” or “recycled yarn”) – buyers love it.
- Style photos on shelves or tables with fairy lights for Pinterest appeal.
Where to sell:
Etsy, craft fairs, local Christmas markets, small boutiques, teacher or coworker gift bundles.
How to create (step by step)
- Prepare the base:
Use small wood discs, corks, or bottle caps as stands. Glue the bottom of your pinecone or foam cone to the base. - Paint or wrap:
If using pinecones, paint them green or white for a snowy look. For foam cones, wrap yarn or twine around tightly from bottom to top, gluing every few turns. - Decorate:
Glue on tiny pom-poms, sequins, beads, or sprinkle glitter. Add a mini star on top if you want. - Seal and finish:
Optional – lightly spray with clear sealer or fake snow spray. - Batch production tip:
Paint or wrap multiple bases first, then decorate in one sitting to save time and keep a consistent look.
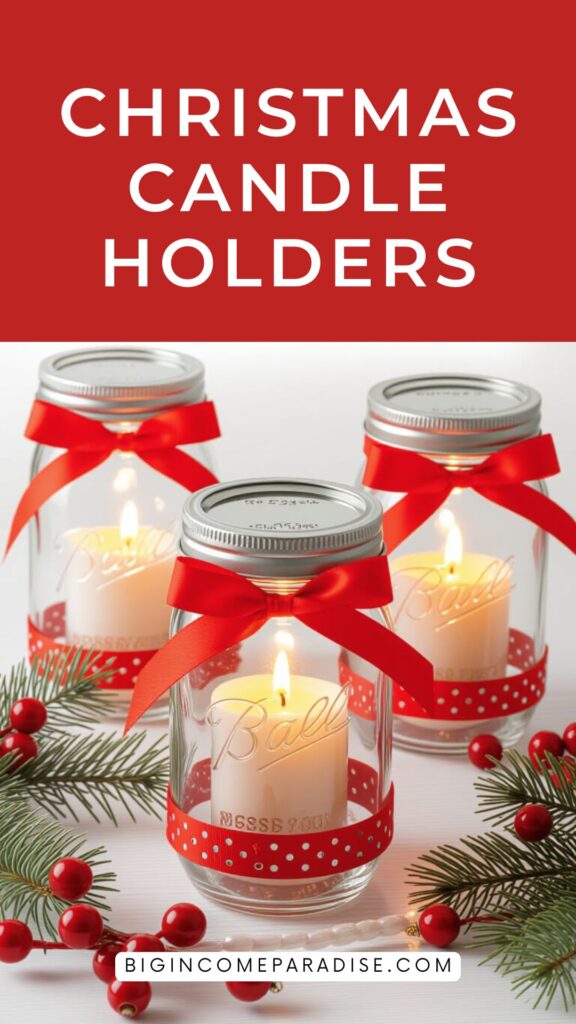
3.) Christmas Candle Holders
Why it sells:
People love quick, cozy décor they can place anywhere – and candle holders instantly make any space feel festive. These are inexpensive to make but look elegant, especially when using glass jars or recycled containers. They sell fast at local markets and make easy holiday gifts.
Popular items:
Frosted glass candle holders, lace-wrapped jars, twine-and-pinecone holders, or mini centerpiece sets.
Specific materials:
Mason jars or small glass cups, twine, lace ribbon, fake greenery, glue gun, paintbrush, Epsom salt or glitter for “snow,” tea lights or LED candles.
Pricing:
$6–$12 per piece or $18–$25 for a set of 3.
Mistakes to avoid:
- Using real candles without testing – always sell with LED lights for safety.
- Applying too much glue (makes it messy and obvious).
- Forgetting to clean jars before painting – paint won’t stick.
How to sell more:
- Bundle in threes (“Rustic Glow Set”).
- Offer color options: white and gold, red and green, or all-neutral farmhouse.
- Use small seasonal scents (add cinnamon sticks or dried orange slices inside for aroma).
- Style your product photos with fairy lights or pine sprigs for warmth.
Where to sell:
Etsy, Facebook Marketplace, Christmas markets, and home décor pop-ups.
How to create (step by step)
- Clean and prep jars:
Wash glass with warm soapy water and dry completely to help glue or paint stick. - Frost the glass (optional):
Brush a thin layer of Mod Podge or spray adhesive on the outside and roll the jar in Epsom salt or fine glitter. Let dry 10–15 minutes. - Wrap and decorate:
Tie lace or twine around the rim or base. Add pine sprigs, berries, small ornaments, or a bow. - Seal (optional):
Lightly spray with a clear sealer to keep the glitter or salt in place. - Add the candle:
Place a tea light or LED candle inside. - Batch efficiently:
Line up 10–20 jars and work step-by-step: frost all first, wrap all second, decorate last. Keeps consistency and saves time.
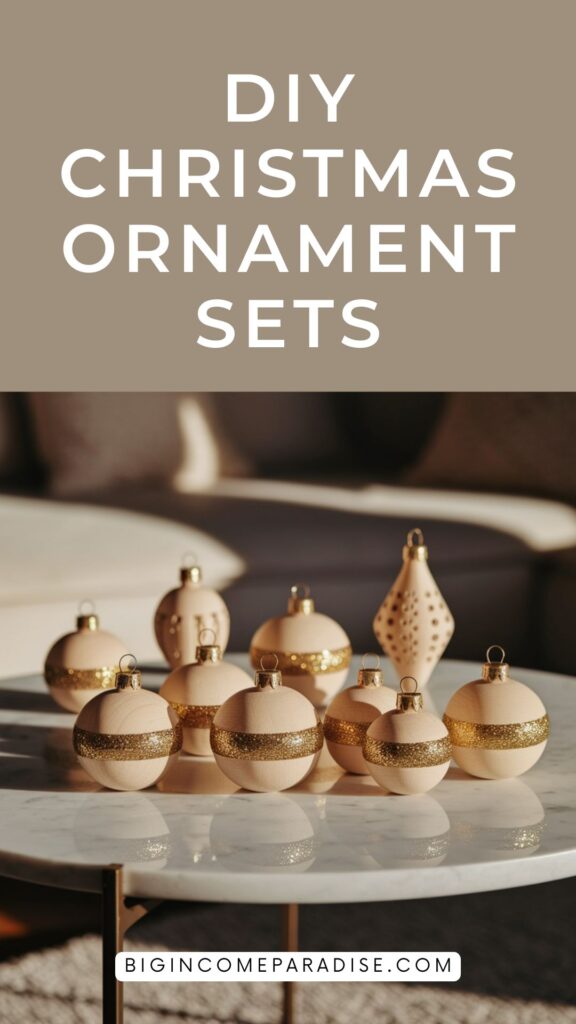
4.) DIY Christmas Ornament Sets
Why it sells:
People love variety, and ornament sets give them that “finished look” without effort. These are perfect for shoppers who want coordinated tree decor but don’t have time to craft. They’re also lightweight, easy to ship, and quick to make in bulk.
Popular items:
Rustic wood ornaments, glitter baubles, felt stars, mini snowflakes, or clay ornaments in matching color themes (red & white, gold & white, farmhouse neutrals).
Specific materials:
Plastic or wood ornaments, acrylic paint or paint pens, jute string, ribbon, glitter, faux snow, small stencils, glue gun, optional filler (mini stars or sequins).
Pricing:
$15–$35 per set (depending on materials and number of ornaments, usually 4–8 pieces per set).
Mistakes to avoid:
- Mixing too many colors or styles in one set – people want cohesive looks.
- Using heavy materials that make ornaments fall off tree branches.
- Forgetting to seal glitter – it sheds everywhere and feels cheap.
How to sell more:
- Sell themed sets: “Winter White Collection,” “Rustic Cabin,” “Candy Cane Sparkle.”
- Offer personalization (names or year on one ornament).
- Use kraft boxes with clear lids or compartments – presentation sells.
- Create matching photo backgrounds so your listings look like boutique sets.
Where to sell:
Etsy, Instagram, Christmas fairs, local boutiques, gift shops.
How to create (step by step)
- Pick a theme:
Choose one color palette and material type (e.g., rustic wood + neutrals, or red glitter + white paint). Keep it consistent for the whole set. - Prep ornaments:
Lightly sand wood ornaments or clean plastic/glass ones. Lay them out in groups for batch painting. - Base coat:
Paint each piece or fill clear ornaments with faux snow or glitter. Let dry for 10–15 minutes. - Add details:
Use paint pens, small stencils, or ribbon trims to create simple patterns (snowflakes, stars, dots, or festive words). - Seal:
Spray with clear sealer or brush a thin coat of Mod Podge to lock in paint and glitter. - String and bundle:
Add jute or ribbon loops. Group 4–8 ornaments per set. Wrap in tissue paper and box them neatly. - Batch tip:
Work by step: paint all bases first, then decorate, then seal and string. You’ll triple your output and keep styles uniform.
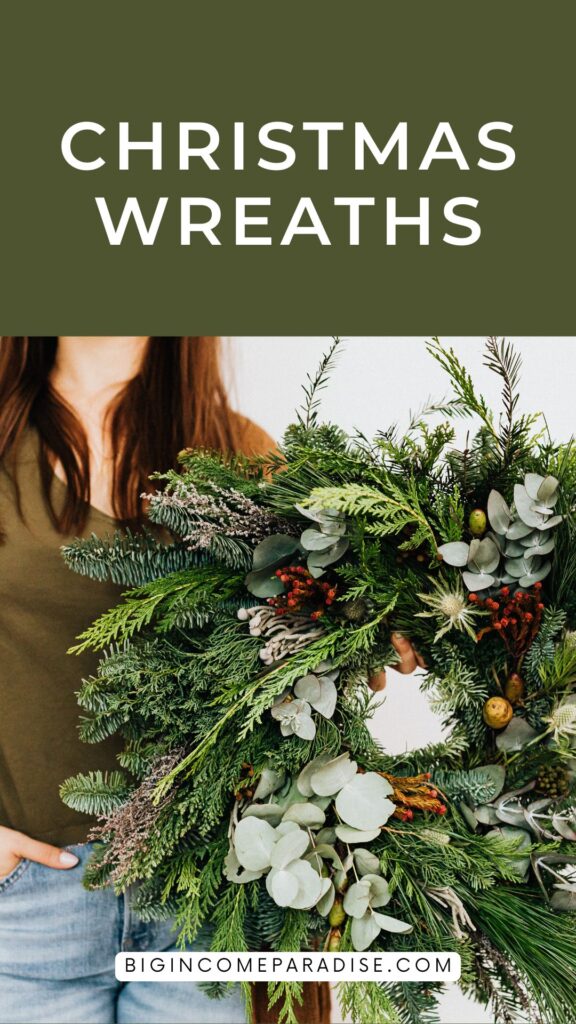
5.) Christmas Wreaths
Why it sells:
Christmas wreaths are timeless. They’re one of the first things shoppers buy to decorate their doors or walls because they create that instant “holiday welcome.” Buyers love handcrafted wreaths that look full and festive without paying boutique prices.
Popular items:
Rustic farmhouse wreaths, red-and-gold traditional wreaths, minimalist greenery with bows, and winter-white snow-covered styles.
Specific materials:
Wire or foam wreath base, faux pine branches, small ornaments, ribbon, pinecones, glue gun, floral wire, scissors, optional berries or bells.
Pricing:
$25–$60 depending on size and fullness. Small 10–12″ versions sell fast for indoor spaces.
Mistakes to avoid:
- Sparse greenery that looks cheap.
- Using heavy ornaments that pull the shape out of balance.
- Forgetting a strong hanger – customers hate when it falls off the door.
How to sell more:
- Offer sizes (small, standard, large) and color themes.
- Create “door-ready” bundles – wreath + matching bow or mini sign.
- Market early (October–November); people decorate before December.
- Photograph hanging on real doors or brick walls for visual appeal.
Where to sell:
Etsy, local gift shops, Facebook Marketplace, Christmas fairs, home décor pop-ups.
How to create (step by step)
- Prep the base:
Choose a wire or foam wreath ring. Wrap it in ribbon or burlap to hide gaps and make the glue stick better. - Add greenery:
Attach faux pine stems or garlands around the frame using floral wire or hot glue. Overlap in one direction for a natural flow. - Add focal decorations:
Glue on pinecones, ornaments, or berries in clusters of three for balance. Keep the top simple and the bottom fuller for a professional look. - Add ribbon or bow:
Create one large bow or weave ribbon through the greenery. Secure with floral wire. - Finishing touches:
Lightly spray with faux snow or add a few small bells for sound and sparkle. - Attach hanger:
Loop sturdy jute, ribbon, or a metal hook through the back for easy hanging. - Batch tip:
Set up an assembly line: cover all bases first, then add greenery, then decorate. It speeds up production and keeps designs consistent.
You’ll also love to read my other blog post: 17 Easy Crafts to Sell That Make a Profit Fast
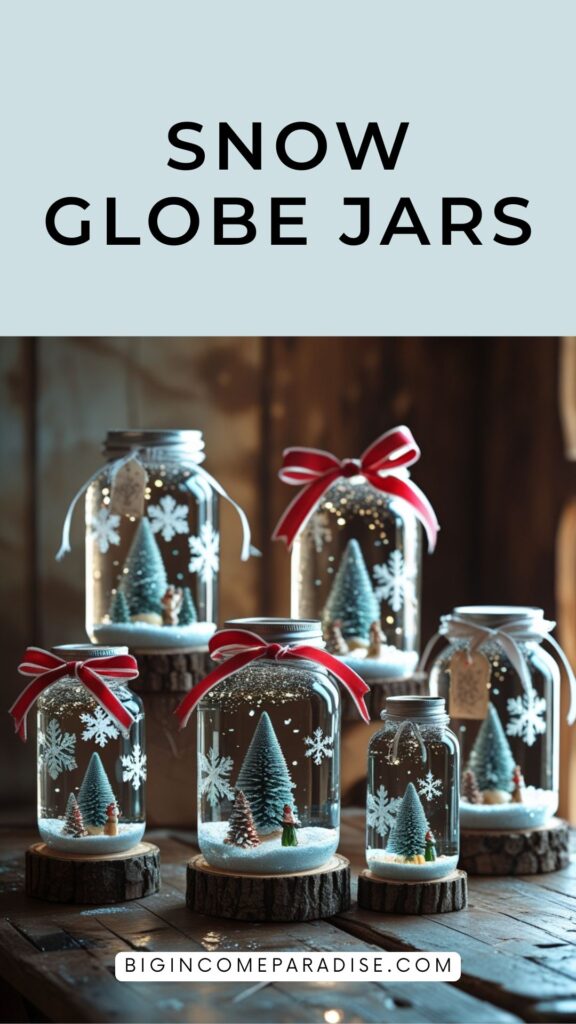
6.) Snow Globe Jars
Why it sells:
Snow globe jars are pure Christmas nostalgia. They’re fun, sparkly, and people love displaying them on mantels, coffee tables, or as kid-friendly décor. They look expensive but cost very little to make – perfect for fast holiday profits.
Popular items:
Mini tree scenes, Santa or snowman figurines, reindeer in snow, or cozy “cabin in a jar” designs.
Specific materials:
Mason jars (small or medium), fake snow or Epsom salt, mini Christmas figurines or trees, strong glue (E6000 or hot glue), ribbon, glitter, and optional fairy lights.
Pricing:
$10–$25 depending on size and detail.
Mistakes to avoid:
- Using too much glue – it shows through the glass.
- Overfilling with snow – it hides the mini scene.
- Not cleaning jars before sealing – causes foggy look inside.
How to sell more:
- Create themed sets (Snowy Forest, Santa’s Workshop, Winter Village).
- Offer with LED light lids for extra sparkle.
- Take bright photos with bokeh-style Christmas lights in the background.
- Sell in protective boxes labeled “Shake-Free Snow Globe Décor.”
Where to sell:
Etsy, Facebook Marketplace, craft fairs, holiday events, boutique shops.
How to create (step by step)
- Clean and prep jars:
Wash, dry, and remove all labels. Make sure the glass is spotless for a clear display. - Create the base:
Glue your mini tree, figurine, or decoration to the jar lid. Let it set completely so it doesn’t shift. - Add snow:
Pour 1–2 tablespoons of fake snow, Epsom salt, or white glitter into the jar. Don’t overfill — leave space for the scene. - Assemble the globe:
Once the glue is dry, screw the lid (with glued items) onto the jar upside down so the scene is inside. - Decorate the outside:
Tie ribbon or twine around the lid. Add a small bow, tag, or mini bell for finishing touches. - Optional lighting:
Wrap a mini LED light string around the base for a premium version. - Batch tip:
Prep all jars and figurine bases first. Glue all at once, let dry, then fill and decorate — saves hours when producing multiple jars.
7.) Fabric Christmas Garland
Why it sells:
It’s cozy, colorful, and gives homes that “handmade Christmas” feeling. Buyers love these because they can drape them on mantels, stairs, or windows for a festive look, without spending hours crafting. They’re reusable, lightweight, and easy to store, making them a no-brainer holiday buy.
Popular items:
Buffalo plaid garlands, red-and-green patchwork styles, neutral farmhouse tones, or shabby-chic garlands with lace and burlap strips.
Specific materials:
Fabric scraps or fat quarters, scissors, twine or jute string, optional ribbon or lace accents, and hot glue (if you want to secure knots).
Pricing:
$12–$25 depending on length (4–8 feet usually sells best).
Mistakes to avoid:
- Cutting uneven strips – makes the garland look messy.
- Using too-heavy fabric that droops.
- Mixing too many clashing prints (stick to 2–3 colors max).
How to sell more:
- Offer sets in different lengths (short for mantels, long for stair rails).
- Market as “reusable eco-friendly décor.”
- Display photos with fairy lights intertwined- they sell instantly when staged well.
- Bundle with matching ornaments or stockings for upsells.
Where to sell:
Etsy, local markets, holiday pop-ups, farmhouse décor stores, Facebook Marketplace.
How to create (step by step)
- Prepare your fabric:
Choose 2–3 coordinating fabrics. Cut long strips about 1 inch wide and 12–15 inches long. You can tear the fabric instead of cutting for a rustic frayed edge. - Lay out your twine:
Cut twine to your desired length, leaving a few extra inches on each end for hanging. Tape it to a table to keep it straight. - Tie fabric strips:
Fold each strip in half, place the loop under the twine, and pull the ends through to create a slip knot. Tighten gently. Repeat, alternating fabrics and colors. - Add accents:
Tie in pieces of lace, ribbon, or thin burlap strips every few knots for texture. - Trim and even out:
Once finished, hang up the garland and trim any uneven ends to make it look polished. - Batch tip:
Pre-cut all fabric strips for multiple garlands at once. Set up an assembly line for fast production – tie, tie, tie while watching Christmas movies.
8.) Christmas Table Centerpieces
Why it sells:
People want their holiday tables to look beautiful, but they don’t want to spend hours arranging decor. Handmade centerpieces give them that “Pinterest-worthy” table without the stress. They’re great sellers because they also double as hostess gifts or entryway accents.
Popular items:
Rustic wood-tray centerpieces, mason jar trios, mini pine forests, or gold-accented candle arrangements (with LED candles for safety).
Specific materials:
Small wood trays or rectangular boxes, faux greenery, pinecones, ornaments, berries, ribbon, glue gun, foam blocks for height, and LED candles.
Pricing:
$25–$45 depending on size and detail.
Mistakes to avoid:
- Overfilling with decorations – clutter looks cheap.
- Forgetting to secure items with glue or foam (they shift in transit).
- Using real candles – melted wax ruins materials and isn’t safe.
How to sell more:
- Offer themed sets like “Rustic Farmhouse,” “Classic Red & Gold,” or “Winter White.”
- Use neutral wooden bases – they work for every decor style.
- Show staged photos on a dining table with napkins and plates.
- Offer refills or upgrade kits for next year (new greenery or bows).
Where to sell:
Local markets, Etsy, Facebook Marketplace, boutique home decor shops.
How to create (step by step)
- Prepare your base:
Use a small wooden tray, crate, or sturdy box. If using a foam block, glue it inside the base to hold pieces securely. - Add greenery:
Arrange faux pine branches or garlands over the foam, spreading evenly to cover the base. Secure with hot glue. - Add focal points:
Place LED candles, ornaments, or pinecones in the center. Make sure the design has height variation (taller in the middle, shorter on the sides). - Decorate:
Add berries, ribbon bows, or gold accents for contrast. Keep color schemes tight – 2–3 colors max looks elegant. - Secure and clean up:
Glue down loose pieces, trim any stray greenery, and make sure the centerpiece looks full but not crowded. - Finishing touches:
Spray lightly with artificial snow or glitter for shimmer. Wipe the base clean before packaging. - Batch tip:
Create multiple bases first, then decorate assembly-line style. Work one color theme at a time to keep your process efficient.
9.) Christmas Stockings
Why it sells:
Christmas stockings are one of the few decorations people actually use – and they love ones that feel unique or personalized. Families often buy multiple, so these sell in sets fast. They’re lightweight, easy to package, and perfect for repeat customers each year.
Popular items:
Rustic burlap stockings, red plaid farmhouse designs, neutral linen with lace trim, or felt stockings with simple embroidery or initials.
Specific materials:
Felt, linen, or burlap fabric, ribbon or lace trim, glue gun or basic sewing kit, small embellishments (buttons, pom-poms, bows), and a hanging loop (jute, ribbon, or cord).
Pricing:
$10–$20 each or $30–$50 per family set of 3–4.
Mistakes to avoid:
- Using thin fabric – it stretches or tears when filled.
- Forgetting to reinforce the hanging loop.
- Overdecorating (too many patterns or bulky trims).
How to sell more:
- Offer bundles (e.g., “Family of 4 Rustic Stocking Set”).
- Add personalization options (names or initials).
- Create a “Mini Stocking Gift Set” version for small gifts or pet stockings.
- Use cozy product photos – stockings hanging by a fireplace or on a rustic ladder.
Where to sell:
Etsy, craft fairs, local Christmas markets, Facebook Marketplace, or through small gift shops.
How to create (step by step)
- Prepare your fabric:
Choose your main material (felt, burlap, or linen). Fold it in half and draw a simple stocking shape – around 16–18 inches tall. Cut through both layers so you have two identical pieces. - Join the pieces:
Either glue the edges with hot glue (leaving the top open) or sew with a simple running stitch around the sides. Reinforce the toe and heel for durability. - Add a cuff or trim:
Cut a contrasting strip of fabric about 3 inches tall to create a cuff. Fold it over the top edge and glue or stitch it in place. - Attach a loop:
Cut a 4–5 inch piece of ribbon, jute, or cord. Fold it into a loop and glue or sew it securely inside the top corner for hanging. - Decorate:
Add bows, buttons, lace, or small appliqués. If personalizing, use felt letters or fabric paint to add names. - Finishing touches:
Check that the stocking hangs evenly and that the seams are tight. Trim any visible threads or glue strings. - Batch tip:
Cut multiple stocking shapes at once using a paper template. Then work in steps – assemble all bases first, then add trims, then personalize – to save time.
You might also like to read this article: 37 Profitable Crafts to Make and Sell for Extra Cash.
10.) Gift Tag Ornaments
Why it sells:
They’re the perfect mix of practical and pretty. Buyers love that they can use them as name tags on gifts and then hang them on the tree afterward. They’re lightweight, inexpensive to make, and look high-end when packaged in small bundles.
Popular items:
Rustic wood slice tags, faux leather tags, clay tags with stamped words (“Joy,” “Peace,” “Love”), or painted wooden tags with names or initials.
Specific materials:
Wood or clay tag blanks, paint or paint pens, small alphabet stamps or stencils, jute string or ribbon, clear sealer, and optional embellishments (mini bells, greenery, or bows).
Pricing:
$2–$5 each or $12–$20 per 4–6 piece set.
Mistakes to avoid:
- Using ink or paint that smudges – always seal them.
- Forgetting the hole at the top for string.
- Making them too large or heavy – they should double as ornaments.
How to sell more:
- Offer personalized options (names, short quotes, or “to/from” fields).
- Bundle as “Reusable Gift Tag Ornament Sets.”
- Style product photos on wrapped gifts and Christmas trees for maximum versatility.
- Package in mini kraft boxes or clear pouches tied with twine – buyers love ready-to-gift packaging.
Where to sell:
Etsy, Facebook Marketplace, local craft fairs, and boutique gift shops.
How to create (step by step)
- Prepare your base:
Use small wooden or clay tags about 2–3 inches tall. If using clay, roll and cut with a tag-shaped cutter, then poke a hole at the top before it dries. - Paint or stain:
Apply a base coat of acrylic paint, stain, or leave natural for rustic style. Let dry 10–15 minutes. - Add lettering or designs:
Use paint pens, alphabet stamps, or fine brushes to write words, initials, or holiday icons (stars, trees, hearts). - Seal:
Once completely dry, brush or spray on a clear matte or glossy sealer to protect from smudges. - String it up:
Thread jute, twine, or ribbon through the top hole and tie a small loop for hanging. Add a mini bell, bead, or sprig of greenery if desired. - Batch tip:
Paint or stamp all tags first, then seal and string them together in sets. Offer 2–3 color themes so they look cohesive when grouped.
11.) Chunky Knit Mini Trees
Why it sells:
These trees are stylish, cozy, and trending every Christmas season. The chunky-knit texture gives off that warm, Scandinavian winter vibe buyers love.
They fit perfectly on shelves, mantels, or office desks and make beautiful gift items. Especially for people who want minimalist or modern Christmas decor.
Popular items:
Neutral cream, soft gray, or sage green chunky-knit trees, often finished with wood bases or stars on top.
Specific materials:
Thick yarn (chunky or chenille), foam or cardboard cones, hot glue gun, small wood slices or corks for bases, optional wooden star toppers, scissors.
Pricing:
$12–$20 each or $30–$40 for a 3-piece set.
Mistakes to avoid:
- Using thin yarn (ruins the “chunky” look).
- Leaving gaps between wraps.
- Forgetting to secure the ends – yarn can unravel in shipping.
How to sell more:
- Sell in sets of three (different heights always sell better).
- Offer modern neutrals (white, beige, blush, or gray).
- Label them “cozy minimalist Christmas decor” for SEO – it converts well.
- Photograph with candles or fairy lights for that high-end holiday vibe.
Where to sell:
Etsy, craft fairs, Instagram shops, local holiday markets, and home decor stores.
How to create (step by step)
- Prepare the base:
Use foam or cardboard cones as your tree form. If you don’t have foam cones, roll a sturdy piece of cardstock into a cone and tape it securely. - Attach the yarn:
Glue one end of the chunky yarn to the bottom of the cone. Let it dry for a few seconds. - Wrap the tree:
Start wrapping the yarn around the cone tightly, moving upward. Apply a thin line of hot glue every few turns to keep it secure. Keep wraps close together for that thick, plush texture. - Finish the top:
Once you reach the top, trim the yarn and glue the end neatly at the tip. Add a small wooden star or bead if you want a topper. - Add the base:
Glue the finished tree onto a small wooden slice or cork to give it a stable bottom. - Optional:
Lightly dust with fake snow or add a bit of sparkle with glitter spray. - Batch tip:
Wrap all your cones first, then glue bases and decorate in batches – this keeps consistency and saves time when creating multiple sets.
12.) Christmas Photo Frame
Why it sells:
Buyers love decor that feels personal, and photo frames are exactly that. A festive frame turns a simple family photo into a keepsake.
They make amazing holiday gifts for grandparents, coworkers, and teachers – and they sell especially well in sets or personalized bundles.
Popular items:
Rustic wooden frames with plaid bows, glittery red-and-gold designs, snowflake frames, and minimalist farmhouse-style frames with engraved or painted text (“Merry Christmas,” “Joy,” “Our First Christmas Together”).
Specific materials:
Plain wood or MDF frames, acrylic paint, paint pens or stencils, small ornaments or bows, glue gun, optional clear sealer, mini embellishments (snowflakes, pinecones, beads).
Pricing:
$10–$20 each depending on size and detail.
Mistakes to avoid:
- Using cheap plastic frames – they look low quality.
- Overdecorating the border (less is often more).
- Forgetting a way for customers to insert the photo easily.
How to sell more:
- Market as “personalized Christmas gift frames” or “holiday keepsake decor.”
- Offer name or year customization for a small fee.
- Create themed versions (rustic farmhouse, glam gold, minimalist white).
- Photograph with printed family photos for emotional appeal.
Where to sell:
Etsy, local gift shops, holiday craft fairs, photo studios, and Facebook Marketplace.
How to create (step by step)
- Prep the frame:
Choose plain wooden or MDF frames. Lightly sand if needed and wipe off dust before painting. - Base coat:
Paint your desired background color (white, red, green, or metallic). Let it dry for 10–15 minutes. - Add festive design:
Use paint pens, stencils, or stamps to add words like “Joy,” “Merry Christmas,” or “Family.” You can also hand-paint snowflakes, holly leaves, or stars. - Decorate the corners:
Glue small bows, pinecones, berries, or tiny ornaments to one or two corners of the frame. Keep it balanced — don’t overcrowd. - Seal (optional):
Brush or spray on a clear matte sealer to protect paint and prevent chipping. - Add a photo:
Insert a demo photo (or Christmas card-style image) before selling so buyers can visualize how it’ll look. - Batch tip:
Paint all frames first, then decorate. Use one color scheme per batch for speed and cohesive sets.
13.) Snowman Ornament Sets
Why it sells:
Snowmen are one of those universal Christmas symbols everyone loves. These ornaments are cute, family-friendly, and easy to make in bulk. They sell well as 3-piece sets because buyers like matching tree themes or gifts for teachers and coworkers.
Popular items:
Mini snowmen made from wood slices, styrofoam balls, or white clay with painted faces and scarves.
Specific materials:
Wood slices or foam balls, white paint, paint pens or fine brushes, mini fabric scraps or ribbon (for scarves), glue gun, jute string or twine, and optional embellishments (buttons, hats, mini pom-poms).
Pricing:
$12–$20 per 3-piece set depending on size and detail.
Mistakes to avoid:
- Painting before the base coat dries (causes smudges).
- Forgetting to seal – unsealed paint can fade or chip.
- Using glue that melts when stored in warm areas – use hot glue or E6000.
How to sell more:
- Bundle in 3s or 5s (“Frosty Family Set”).
- Offer optional personalization (names, years, or short phrases like “Let It Snow”).
- Package in small kraft boxes with fake snow or shredded paper for gift-ready appeal.
- Show photos on both white and green Christmas trees for contrast.
Where to sell:
Etsy, craft fairs, holiday markets, and local gift shops.
How to create (step by step)
- Prepare the base:
Paint wood slices or foam balls white and let dry fully. If using multiple pieces for a snowman body, glue them together vertically before decorating. - Add details:
Use paint pens or a fine brush to draw eyes, carrot noses, and smiles. Add buttons or dots down the middle. - Make scarves and hats:
Cut small strips of fabric, ribbon, or felt for scarves. Glue them around the neck area. For hats, glue a mini pom-pom on top of a felt band or use small bottle caps painted black. - Attach hanging string:
Tie or glue jute twine or ribbon at the top to create a loop for hanging. - Seal:
Lightly spray or brush on a clear sealer to protect the paint. - Optional sparkle:
Add a dusting of glitter or fake snow for a frosty look. - Batch tip:
Paint all bases first, then add details and scarves in batches. This makes it faster to produce consistent-looking sets.
14.) Candy Cane Bead Ornaments
Why it sells:
These ornaments are bright, nostalgic, and perfect for families with kids. They’re cheap, cheerful, and quick to make – yet they look store-bought when finished cleanly. Parents love buying them as small teacher or neighbor gifts, and they’re easy impulse buys at craft fairs.
Popular items:
Classic red-and-white candy canes, pastel pink-and-white for modern themes, or metallic gold-and-silver versions for glam decor.
Specific materials:
Red and white pony beads (or any two coordinating colors), thin craft wire or ornament hooks, wire cutters, small bows or ribbons for decoration.
Pricing:
$2–$5 each or $10–$15 per 3–5 piece set.
Mistakes to avoid:
- Using string instead of wire – they lose shape.
- Making them too long (6 inches max looks best).
- Not securing the beads – they’ll slide off if ends aren’t looped tightly.
How to sell more:
- Sell in themed bundles (Classic Red, Frosted Pink, Gold Luxe).
- Offer mix-and-match sets for stocking stuffers.
- Photograph grouped in mugs, jars, or hanging on trees for visual variety.
- Market as “kid-safe shatterproof ornaments” — great for families.
Where to sell:
Etsy, local markets, school fundraisers, community fairs, and pop-up holiday shops.
How to create (step by step)
- Cut wire:
Use thin craft wire about 8 inches long. Straighten it gently with your fingers. - Thread beads:
Alternate red and white beads (or your chosen colors) until the wire is about 6 inches filled. - Form the candy cane:
Bend the top of the wire into a hook shape to form the candy cane curve. - Secure the ends:
Use pliers to twist or fold each end of the wire into a tiny loop so beads can’t fall off. - Add ribbon or bow:
Tie a small ribbon or glue a mini bow near the top curve for decoration. - Optional sparkle:
Brush with a thin coat of Mod Podge and sprinkle glitter if you want a sparkly finish. - Batch tip:
Pre-cut all wires and sort beads into color bowls. Thread all red-white patterns first, then bend all into candy canes at once – this saves tons of time.
15.) Snowflake Resin Ornaments
Why it sells:
They look high-end and polished, yet they’re simple to make with basic resin molds. Buyers love that every piece is unique – clear, sparkly, and full of that “icy” Christmas charm. They make perfect gifts and upscale tree ornaments that stand out next to store-bought decor.
Popular items:
Clear glitter-filled snowflakes, frosted white snowflakes with metallic flakes, and colored resin versions in blues, silvers, and golds.
Specific materials:
Epoxy resin kit, silicone snowflake molds, mica powder or glitter, mixing cups, popsicle sticks, gloves, and small ribbon or twine for hanging.
Pricing:
$6–$10 each or $20–$30 per 3-piece set.
Mistakes to avoid:
- Mixing resin incorrectly (always follow the ratio exactly).
- Pouring too thick or fast – causes bubbles.
- Forgetting to add the hanging hole or hook before the resin fully cures.
How to sell more:
- Package in elegant boxes labeled “Luxury Snowflake Ornament Set.”
- Offer bundles by color theme (Silver Frost, Winter Blue, Gold Spark).
- Take close-up photos showing shimmer and light reflection.
- Market as “handcrafted resin decor – durable and reusable year after year.”
Where to sell:
Etsy, local holiday fairs, online gift shops, and home decor boutiques.
How to create (step by step)
- Prepare workspace:
Work on a flat, covered surface in a ventilated area. Put on gloves and read your resin instructions carefully. - Mix resin:
Combine resin and hardener according to the kit instructions (usually a 1:1 ratio). Stir slowly for about 2–3 minutes until clear and fully blended. - Add color or glitter:
Mix in mica powder, pigment, or fine glitter for shimmer. Don’t overload – a little goes a long way. - Pour into molds:
Slowly pour resin into silicone snowflake molds. Tap the molds gently to release bubbles. - Add hook or hole:
When resin starts to thicken (after about 15–20 minutes), insert a small eye screw at the top for hanging. - Cure:
Let the resin cure flat for 12–24 hours, depending on the brand. Do not move it during this time. - Unmold and finish:
Gently remove snowflakes from molds. Sand rough edges if needed. Tie ribbon or jute string through the hook or hole. - Batch tip:
Pour multiple molds at once. While one batch cures, mix the next – keeps your workflow steady and efficient.
You might also want to read about these 19 Profitable Christmas Decor Ideas You Can Make And Sell.
16.) Oversized Ornaments for Front Porch
Why it sells:
Big, bold, and festive – these grab attention instantly. Homeowners love statement decor that makes their porch or yard stand out.
Oversized ornaments are trending because they create that “Pinterest Christmas porch” look without requiring complex tools or high cost.
Popular items:
Red-and-gold oversized ornaments, striped “candy cane” balls, or metallic sets made from lightweight materials like plastic bowls or foam.
Specific materials:
Two large plastic bowls or round foam balls, spray paint (metallic or gloss), ribbon, rope, glue gun, optional vinyl stickers, and small plastic caps or lids for the ornament top.
Pricing:
$20–$40 each or $60–$100 per set of 3.
Mistakes to avoid:
- Using heavy materials that won’t hold up outdoors.
- Painting without priming – paint peels in cold weather.
- Not sealing – moisture can dull the finish fast.
How to sell more:
- Sell in sets of 3 or 5 for complete porch styling.
- Offer color themes like Classic Red & Gold, Winter Silver & Blue, or Candy Cane Delight.
- Show photos displayed beside front doors or Christmas trees.
- Label as “Lightweight Weather-Resistant Porch Ornaments.”
Where to sell:
Local holiday markets, Facebook Marketplace, Etsy (for locals), or home decor pop-ups.
How to create (step by step)
- Prep your materials:
Use two identical large plastic bowls or a round foam ball. Clean surfaces to remove any dust or stickers. - Assemble the ornament shape:
If using bowls, glue the rims together with a hot glue gun to form a sphere. Let dry completely. - Prime and paint:
Spray a coat of plastic primer if needed. Then apply 2–3 thin coats of spray paint (metallic, red, gold, or silver). Let dry between coats for a glossy finish. - Add the ornament top:
Glue a plastic cap or small container (like a bottle lid) to the top as the ornament cap. Wrap the base of it with rope or ribbon to hide seams. - Add finishing touches:
Tie a large decorative bow or loop rope around the top for hanging or display. You can also add stripes or dots using vinyl or painter’s tape before painting. - Seal:
Spray a clear outdoor sealant to protect from moisture and fading. - Batch tip:
Paint multiple ornaments in one session using different color themes. Work outdoors or in a ventilated area and dry them upside-down for smooth coverage.
17.) Gnome Ornament Sets
Why it sells:
Christmas gnomes are one of the most consistent sellers every holiday season. They’re cute, cozy, and instantly recognizable – buyers love using them on mantels, shelves, or trees.
Since each gnome only takes a few minutes to make, they’re one of the most profitable handmade decorations you can produce in bulk.
Popular items:
Neutral Scandinavian-style gnomes, red-and-gray Christmas gnomes, and mini glittery hat versions for modern decor.
Specific materials:
Wood beads (for noses), faux fur (for beards), felt or fabric (for hats), small wood cones or corks (for bases), hot glue gun, scissors, and jute string if you’re making them hangable.
Pricing:
$10–$18 per 3-piece set or $25–$35 for 5-piece “family sets.”
Mistakes to avoid:
- Using low-quality faux fur that sheds.
- Forgetting to trim the beard evenly – messy edges look unprofessional.
- Gluing hats too flat (they should sit slightly lifted for a 3D effect).
How to sell more:
- Offer “Winter Neutral”, “Classic Red”, or “Farmhouse Gnome Family” bundles.
- Market as both ornaments and shelf decor.
- Use kraft boxes with shredded paper and clear lids for “gift-ready” packaging.
- Photograph them in sets with fairy lights or snow props for cozy appeal.
Where to sell:
Etsy, local craft markets, Facebook Marketplace, boutique gift stores, and holiday fairs.
How to create (step by step)
- Prepare your base:
Use a small wooden cone, cork, or bead as the gnome body. If making ornaments, cut 6–8 inch lengths of jute string to create hanging loops first. - Attach the beard:
Cut a small triangle of faux fur (about 2–3 inches wide). Glue it near the top front of the body. Let dry for 1–2 minutes. - Add the nose:
Glue a wooden bead or small round button right above the beard edge. Press lightly until secure. - Make the hat:
Cut a felt triangle (roughly 4×4 inches). Roll into a cone shape and glue along the edge. Once dry, glue the hat over the top of the gnome’s “head,” letting it overlap slightly over the nose. - Add string (if hanging):
Glue a loop of jute or ribbon to the top inside of the hat before sealing it down. - Decorate:
Add small pom-poms, snowflake charms, or a dusting of glitter on the hat for detail. - Batch tip:
Pre-cut all hat shapes and fur pieces in one sitting. Then assemble all gnomes step-by-step (beards first, noses next, hats last). This keeps production smooth and fast.
18.) Holiday Door Knob Hangers
Why it sells:
They’re small, simple, and add instant Christmas charm to any room. Buyers love them because they can decorate doors, cabinets, or even gift bags – no nails or hooks needed.
They’re affordable, easy to ship, and make perfect add-on items for bigger purchases.
Popular items:
Jingle bell door hangers, farmhouse-style wood ring hangers, and felt or faux greenery versions with plaid bows.
Specific materials:
Wood or metal rings (or embroidery hoops), ribbon, faux greenery or pine branches, small ornaments, hot glue gun, twine or rope, and jingle bells.
Pricing:
$8–$15 each or $20–$30 per 3-piece set.
Mistakes to avoid:
- Using bells that don’t actually jingle.
- Forgetting a secure ribbon loop for hanging.
- Overcrowding the ring with decorations – it should hang freely and move easily.
How to sell more:
- Offer in sets (e.g., Kitchen Trio Set or Classic Red & Gold Set).
- Add personalization – names or short phrases like “Ho Ho Ho” or “Joy.”
- Photograph on door handles, cabinets, and gift bags to show versatility.
- Bundle with matching wreaths or garlands for a complete décor look.
Where to sell:
Etsy, craft fairs, home décor boutiques, Facebook Marketplace, and local Christmas markets.
How to create (step by step)
- Prepare the base:
Use a small wood or metal ring (about 3–4 inches wide). If using an embroidery hoop, remove the inner ring and paint or wrap it with ribbon for a finished look. - Add ribbon or rope:
Cut a 12–14 inch piece of ribbon or jute rope. Thread it through the ring and tie the ends together to create a large hanging loop for the doorknob. - Attach greenery:
Hot glue or wire a few small sprigs of faux pine or greenery to the bottom or side of the ring. Keep it balanced but not bulky. - Add bells and accents:
String 2–3 jingle bells on thin twine and attach them to hang from the center of the ring. You can also glue small ornaments or pinecones beside the greenery. - Add finishing touches:
Tie a bow at the top or bottom (depending on the design). Add small charms, berries, or faux snow if you want extra detail. - Seal (optional):
Lightly spray with clear sealer if using outdoors to protect against moisture. - Batch tip:
Prep all your bases and ribbons first, then decorate in stages – greenery, bells, bows – for faster, cleaner assembly.
19.) DIY Christmas Book Decor
Why it sells:
These vintage-style Christmas books are a showstopper. They blend nostalgia with elegance – perfect for farmhouse, vintage, or European Christmas themes.
Buyers love displaying them on mantels, coffee tables, or shelves. Each book looks like a high-end boutique piece but costs very little to make.
Popular items:
Victorian Christmas books, Santa or tree-themed open books, and neutral “antique” versions with gold or white accents.
Specific materials:
Old hardcover books, decoupage glue (like Mod Podge), printable vintage Christmas images or scrapbook paper, acrylic paint (cream, beige, gold), faux greenery or berries, ribbon, glitter, and optional molding paste for 3D texture.
Pricing:
$25–$45 each depending on detail and size.
Mistakes to avoid:
- Skipping the paint base coat (pages look dull instead of vintage).
- Using too much glue – it wrinkles the paper.
- Forgetting to seal – unsealed prints fade quickly.
How to sell more:
- Offer themed collections (Victorian Christmas, Rustic Nativity, French Country Holiday).
- Display photos with candles and greenery to show styling ideas.
- Market as “luxury handmade Christmas décor”
- Sell locally (they’re delicate to ship) or offer pickup for collectors and decorators.
Where to sell:
Etsy, local craft fairs, home décor boutiques, Instagram, and Facebook Marketplace.
How to create (step by step)
- Choose your book:
Pick a hardcover book (thrift stores are perfect). The thicker the spine, the more dramatic the look. - Secure the pages:
Open the book halfway. Use strong glue (like wood glue or hot glue) along the spine to hold it open. Brush a watered-down layer of glue over the outer pages and edges to stiffen them. Curl a few page edges over a paintbrush to give them that “frozen in time” look. Let dry. - Paint the base:
Apply a coat of cream, ivory, or light beige chalk or acrylic paint over the entire surface (pages and cover). Let it dry completely. - Add main designs:
Use vintage-style prints or transfers like Santa, Christmas trees, or text (e.g., “Merry Christmas” or “Good Tidings of Comfort and Joy”). Glue or transfer them onto the pages. Smooth gently to avoid wrinkles. - Create 3D details (optional but stunning):
You can use air-dry clay molds for garlands, bells, trees, or presents. Glue them onto your pages using strong glue. If you don’t have molds, fake greenery, tiny ribbons, or flat embellishments work beautifully too. - Add vintage stamping or lettering:
Stamp or stencil Christmas phrases or decorative patterns. Slight imperfections add to the charm. If the ink looks too dark, dab gently with a wet wipe to fade it. - Paint the embellishments:
Use Christmas tones like red, green, bronze, gold, or silver. Add small dots of red paint to mimic berries or ornaments. Dry brush gold or bronze on raised edges for a soft antique glow. - Age and antique the book:
Lightly brush or sponge brown glaze or diluted brown paint over the background, corners, and page edges. Wipe back the excess for a soft aged effect. This step gives the book a rich, vintage patina. - Optional crackle finish:
For a true antique look, apply a two-step crackle medium over the pages. Once cracks form, brush a dark glaze into them and wipe away the extra to highlight the texture. - Add sparkle (optional):
Use a clear topcoat or glue to dab small areas and sprinkle with fine glitter. A little goes a long way. - Final sealing:
Seal everything with a clear matte or satin topcoat (Mod Podge or clear sealer). Let it dry overnight. - Finishing touches:
Glue a piece of velvet or satin ribbon in the book’s center to look like a bookmark. Paint or tidy the back cover if needed. - Batch tip:
Work in stages for efficiency – glue all books first, then paint, then decorate. This keeps your process smooth and consistent.
Check out these 17 Profitable Christmas Crafts Anyone Can Make and Sell.
Conclusion
Holiday shoppers don’t just buy decorations; they buy the feeling behind them.
So whether you’re crafting a few festive pieces for extra income or turning your creativity into a full seasonal shop, start with what feels fun to make.
Because when you enjoy the process, it shows. And that’s exactly what makes your Christmas decorations sell.
Now grab your glue gun, queue up some Christmas music, and get those bestsellers ready before everyone else does.