If you have been wondering how all those leaders in your niche are ranking their Pinterest images and how they get so much traffic to their blogs, then you are in the right place.
We are going to talk about the most important elements of a Pinterest image that will get you clicks on your blog. I won’t guarantee that your Pinterest pin is going to be viral, but it could happen.
Now before we start talking about those 20 tips, I would like to invite you to our FREE Coaching Group for entrepreneurs who want to learn how to use Social Media Marketing to get traffic, leads, and sales fast. You can join us by CLICKING HERE or on the button below. Let’s achieve more together!
Get my free Pinterest mini-course that will show you how I get 10,000 – 15,000 people per month to my business.
1.) Pinterest pin size in 2024:
Pinterest is a visual search engine, so your Pinterest images play a big role. If you use the wrong size, you won’t get much traffic from Pinterest. That’s why we have to go over this topic first.
Pinterest is always changing, and they changed their preferred pin size too. They actually suggest you use 1000 x 1500 pixels or any 2:3 aspect ratio.
2.) Use your branded colors:
It is really important to use your branded colors because your audience will get used to your pins and will recognize them fast. That means when you will get a better reputation, more of your audience will click on your pins.
When you start with Pinterest marketing, you can test different colors. But when you figure out which ones work best, then only use those.
So what does it mean to use the same colors? It means you need to write down the hex codes (for example hex code for the white color is #FFFFFF). And you should make sure to choose up to 3 or 4 colors that complement each other.
Examples of my branded colors:
Pink #FF2E93
Yellow #F9F871
Blue #0DA4BD
Purple #C24DF0
3.) Choose your fonts:
Fonts are a part of your brand too. It’s most important that you brand yourself the right way, which means even with the smallest details like colors and fonts.
Here are a couple of really important things you need to consider when choosing your fonts:
- Are they hard to read? If yes – don’t use them!
- Does font #1 go together with font #2? You can use FontPair.co to get more ideas
- Choose up to 4 fonts but don’t use them on the same pin!
- Do you really love the fonts you picked? If your answer is NO, then keep searching, but don’t overthink it.
You can also choose the fonts in Canva. If you click on the text button, there will be many different options, and all those fonts go together nicely (see the example below):

4.) Use some interesting elements on your Pinterest images:
In Canva, there are many different elements that you can use. For example different shapes, gradients, lines, illustrations, icons, and more. This will grab the attention of your audience.
However, make sure you are not using too many elements. You know what they say: “Less is more!” Above all, you want to attract people to your Pinterest images, not scare them away 🙂
In short, create more simple and clean pins.
5.) Use eye-catching titles:
Besides the whole Pinterest image, your audience will see your title too. Of course, if you include it, you should. Your audience needs to know what they will read on your blog, and the title will tell them exactly that.
If you have an idea of what you will write about but you don’t know how to write an eye-catching title, then this free tool will help you – it’s called Title Generator.
Now about the titles on your Pinterest image – here are a couple of the most important things you should always do:
- Create BIG titles with fonts that are easy to read (on a computer or phone)
- Don’t use clickbait titles that have nothing to do with your blog post (your audience won’t appreciate it if you trick them)
6.) Use professional images that reflect your brand:

There are many different places where you can find professional images.
Now I know you’re asking yourself, “Why should I pay for photos?” and explain, I’ll share my own story. Before, I had been using free stock photos, but that’s what 97% of people are also using.
That means I have been blending in with the masses. But I have been thinking about how I could stand out. I knew Pinterest is a visual search engine, so that means I should step up my game with professional stock photos.
I invested in Ivory Mix stock photos (plus got a GREAT deal!), and after using professional photos – my traffic doubled in just 2 weeks. In short – it pays off to invest in Ivory Mix photos (you can CLICK HERE and get them – free and paid).
IMPORTANT TIP:
Also, make sure you are using photos that go with your brand. For example, if you are in a weight loss niche, use photos of healthy food and people who exercise.
7.) Start creating Pinterest infographics:
At first, I didn’t use infographics because I thought they didn’t work as well. But don’t repeat my mistake, and don’t assume something doesn’t work. Test it out first, and you will see.
I was blown away by how fast I started ranking those infographic pins. People really love them, and they are easy and fun to make. Just use Canva to create all your pins, including infographics.
8.) Use Canva to create your Pinterest images:
Canva is a free (they have a paid version, too) online tool for creating graphics. If you have never used it, don’t worry because it’s simple to use. I created a video for you to show you how to create beautiful infographics for Pinterest – watch the video below:
9.) White color works best:
I have been testing different designs on Pinterest for a couple of months now, and the best-performing Pinterest images have one thing in common. Lots of white space.
I’m not saying you should just use a white background and nothing else, but try and use photos that use white objects. You can see in the image below (on the left side) there is a lot of white in the pins:

But before you start testing with white space on your Pinterest images, know that it might not work for you. We have a different audience, so it depends on what they like more.
Test it out for a month or two, and you will see what works best for you.
10.) Give your Pinterest image a good title:
When you save your image in Canva or any other graphics tool that you use, make sure you give that picture a title. But not just any title; it should be the same as your blog post or something similar.
Let’s take, for example, this blog post you are reading right now. I will give the same (or similar) title to my Pinterest image as you see in this blog post: How To Create Killer Pinterest Images That People Click
This is for Pinterest SEO – it will improve your Pinterest ranking!
11.) Use your logo:
Your logo is a part of your brand, so use it everywhere, especially on your Pinterest images. If you don’t have it yet, then you can create it for Free or outsource it by paying someone from fiverr.com (it’s usually just $5).
Make sure your logo has your branded colors and fonts!
In this video below, I show you how to create a Free logo for yourself:
12.) Have a text overlay on your Pinterest images:
You should always include a text overlay – your headline on pins. But besides the headline, you can also include a short description of the blog or even a bit more text (for example, in infographics).
However, two other great strategies work amazingly well, and we are going to talk about them next, so read on…
13.) Use CTA (call to action):
You should include a call to action, for example: “LEARN MORE.” By telling them what to do next, they are more likely going to do it. So when you are in Canva, create a simple button and put the call to action over it. Yes, it’s that easy.
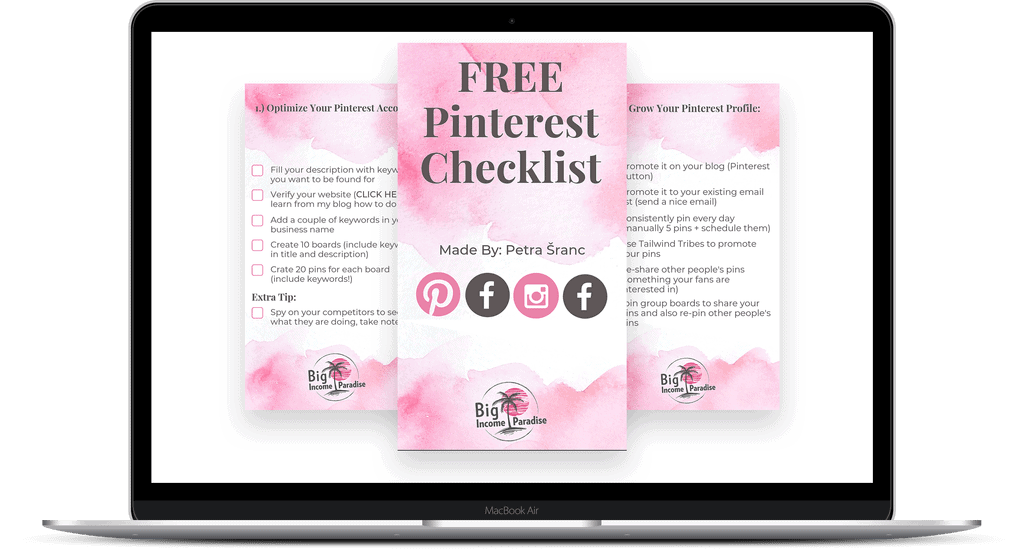
14.) Tell them about your Freebie:
If you are offering a Freebie in your blog post, then make sure you tell your audience about it. You can just write something like this on your Pinterest image:
+ FREEBIE: Pinterest Checklist
You can also create a mockup photo of your Freebie like the example photo below.
15.) Design multiple Pinterest images for the same blog post:
This is really important because you will get lots of different people to your blog and Pinterest account. And you know what that means? Different people like different designs.
Some will share Pinterest image #1; some will share image #2, and others image #3, and so on. So if you want to get your pins shared more, then create multiple different designs.
There is also another plus; you can share your blog post on Pinterest more than once.
16.) Save time and re-use your Pinterest image templates:
If you didn’t watch the video above about how to create infographics in Canva, then go back and check it out. I explain how you can re-use your Pinterest templates.
This trick will save you a TON of time. And that’s what you probably want, right? So when you create your Pinterest images, just make a copy in Canva and create another pin for a different blog post.
17.) Test, test, test:
We all have different audiences on Pinterest, so what works for me might not work for you. That’s why it’s important to test everything. You could make a Pinterest image design that will skyrocket your traffic.
But make sure you are not doing a short test. What I mean by that is that you should always test for a longer time (a month or two).
Check your Pinterest analytics regularly to see which pins are performing the best.
18.) Show step-by-step photos:
If you are selling a product, you can create a Pinterest image with step-by-step instructions on how you use that product. Your audience will love you for that.
Another way you can use that product is in the video tutorial. You can upload a video on Pinterest, so test it out.
19.) Create different pin designs:
Don’t stick with one style of pin. Your audience will get bored, and soon they won’t follow you anymore. You don’t want that, right? So here are some examples of Pinterest images you should create to attract more people to you:
- Infographics
- Title + image background
- Title + simple color in the background
- List pins
- Videos
- DIY pins
- How-to
- Before & after
- Moving image
20.) The most important part is to create a keyword-rich description:
I know this is not a part of the Pinterest image, but it is one of the most important things you should do! This plays a big role in Pinterest SEO, and if you do it right, your pins will rank high, which means FREE TRAFFIC for you.
So make sure you do your keyword research and include those words in your Pinterest title & description. If you don’t know how exactly you should use Pinterest SEO and keywords, then check out my FREE PINTEREST COURSE here or click on the button below.
Did you get some value from this blog post about How To Create Killer Pinterest Images That People Click? I hope you did because every week I put my whole heart into giving you the most amazing tips and strategies that help you succeed in your business.
If You Love Sharing Valuable Info Then Click Below And Share This On Your Favorite Social Media
You post goes in depth to explain how to create good pinterest images. These are helpful tips especially to new Pinterest users! Thanks.
Hey John! I’m glad you got lots of value from my post. I always focus on providing more value for my amazing readers 🙂
Great info on this…Will refer to it for sure…thanks so much 🙂
Hi Cynthia 🙂 You’re welcome.
Great tips Petra! I’m new to Pinterest and slowly and steadily learning a million nuances about creating killer images. This is really helpful. Thanks!
Hey Sam, I’m glad my blog post is helpful. Keep learning and you’ll get great results I’m sure 🙂
Great post! I love Canva. I’m using the paid version, so I can keep my brand colors and fonts ready…that’s one of my favorite features!
Hey Jessica. Yes, Canva is amazing!
I need to be more creative with my CTA’s. For some reason, they just stump me!
Hey Kari. Do a little research and see how others are doing it. And write down the CTA’s that you love most, then start using them 🙂
So many great tips! Thanks for sharing, it’s very helpful
I’m glad you love the tips, Romina 🙂
Awesome tips. Thank you!
You’re welcome, Jamie.
Hi Petra,
Awesome article. I love how extensive this article is. Yes, I agree with what you said to use eye-catching title, and use professional images that reflect your brand.
Thank you for this.
Love this post. Putting in my Pocket!
Hey Angela. I’m glad you love my post. Yes, we definitely need to use eye-catching titles and professional images 🙂
This is such great info!!! I’ve been struggling with Pinterest so this really helps!
Hey Cynthia. I’m glad my blog post helped you. You don’t need to struggle with Pinterest anymore. I have a Free Pinterest Marketing Course RIGHT HERE.
So much value in this post! Bookmarking it for reference. Thanks for this!
Hi Jen! I’m really happy you got lots of value 🙂
Nice article i have been looking for how to create good pinterest images so that i can generate traffic form pinterest. Thanks for sharing this ideas
Hey Onecha 🙂 I’m glad you got lots of value from my blog post. Thank you for reading it!